Anthem - TryHackMe
A beginner-friendly Windows penetration-testing walkthrough covering web reconnaissance, robots.txt, hidden flags, credential discovery, RDP access, and Windows NTFS permissions.

Overview
Anthemis a beginner-level Windows room that demonstrates how small information disclosures can lead to access to a machine.
The main challenge is not exploiting a complex vulnerability. Instead, we need to pay attention to the information exposed by the website, inspect its source code, identify the administrator, discover a password hint, and understand Windows file permissions.
1. Reconnaissance
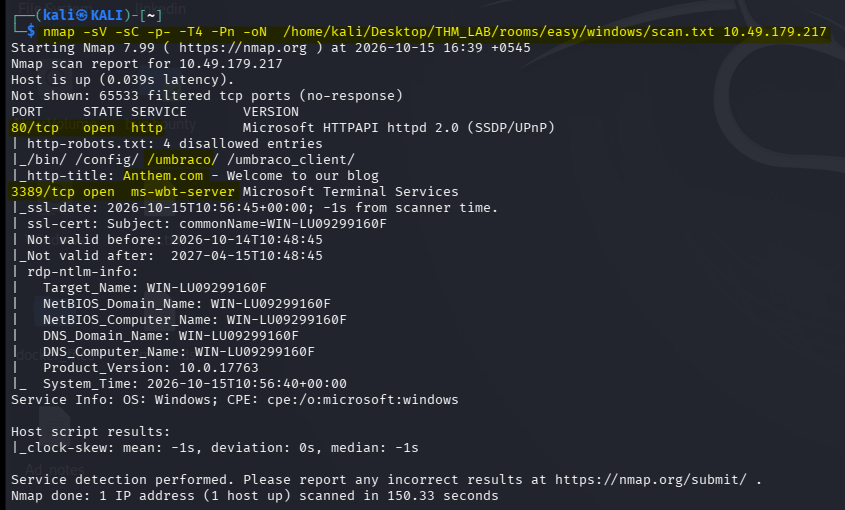
I started by performing a full TCP port scan against the target machine.
nmap -sC -sV -p- -T4 \
-oN /home/kali/Desktop/THM_LAB/rooms/easy/windows/anthem/scan.txt \
<TARGET-IP>
Understanding the command
-sCruns Nmap’s default scripts.-sVattempts to identify service versions.-p-scans all TCP ports from 1 to 65535.-T4uses a faster timing profile.-oNsaves the output in normal text format.
The important services to look for are:
| Port | Service | Purpose |
|---|---|---|
| 80/tcp | HTTP | Website enumeration |
| 3389/tcp | RDP | Remote Windows desktop access |
The exact results can vary depending on the target’s configuration and scan output.
The web server was the best starting point because we did not yet have credentials for RDP.
2. Web Application Enumeration
I opened the target in my browser: http://<TARGET-IP>/
The website displayed a blog for Anthem.
Rather than immediately running password attacks, I explored the available pages and looked for information that could help identify users or reveal credentials.
I focused on:
- The homepage and blog posts
- Author profiles
- Page source
robots.txtsitemap.xml- Links to other application paths
Check robots.txt
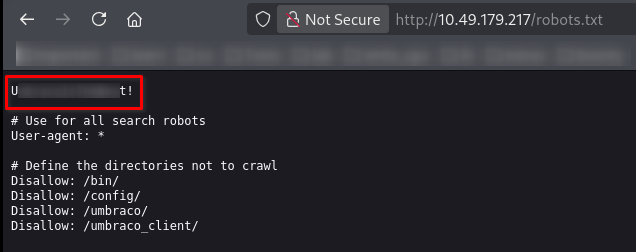
I visited: http://<TARGET-IP>/robots.txt
The file contained entries such as:
/bin/
/config/
/umbraco/
/umbraco_client/
It also exposed a possible password: U<REDACTED>!
This was an important discovery.
Why does robots.txt matter?
Web crawlers use robots.txt to learn which paths a website owner prefers they not crawl. It is not an access-control mechanism. Anyone who knows the URL can read the file.
Developers should never store passwords or other secrets in it.
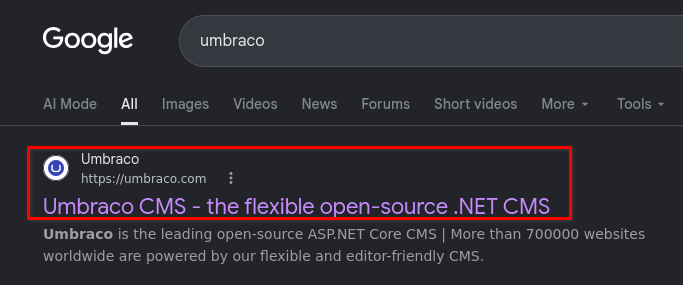
The /umbraco/ path also suggested that the website used the Umbraco content management system (CMS).
I kept this information for later use rather than attempting to brute-force the login page.
3. Identify the Website’s Domain and CMS
The website content and exposed paths provided clues about the technology being used.
The site was associated with: anthem.com
The /umbraco/ directory indicated that the CMS was: U<REDACTED>o
The website’s IIS-related response and the Nmap results also helped identify it as a Windows-hosted web application.
The important lesson is that you can often learn a great deal from ordinary HTTP responses, page content, and exposed paths without running an aggressive vulnerability scanner.
4. Identify the Administrator
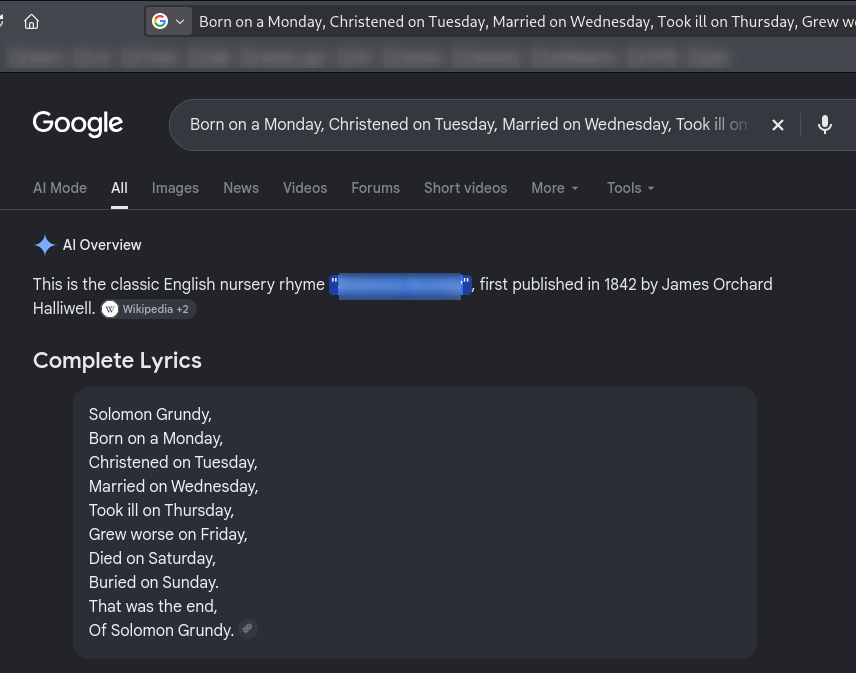
The blog contained a post featuring a nursery rhyme about a person.
I followed the article and investigated the poem rather than treating it as irrelevant content.
The poem was **S
This provided the administrator’s name: S<REDACTED>y
This step demonstrates a basic form of OSINT (open-source intelligence): using publicly available information to identify a target account.
Discover the administrator’s email
Another page contained an email address belonging to a different user: JD@anthem.com
The website suggested that the administrator’s email followed the same naming convention.
The initials of Solomon Grundy are SG, so the likely address was: SG@anthem.com
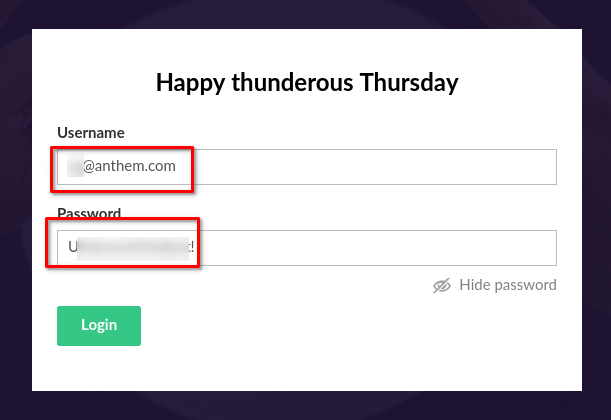
At this point, I had collected three useful pieces of information:
CMS:       Umbraco
Username:  SG@anthem.com
Password:  U<REDACTED>!
These credentials could be tested against the Umbraco login page.
5. Access the Umbraco Administration Panel
I opened: http://<TARGET-IP>/umbraco/
The page presented an Umbraco login interface.
I tested the credentials found during reconnaissance:
Username: SG@anthem.com
Password: U<REDACTED>!
The credentials provided access to the CMS.
This illustrates how information disclosure can become an authentication weakness when an exposed password is reused or intended to grant access to an administrative interface.
However, the room’s later RDP stage is separate: use the credentials and username format appropriate to the target’s Windows login.
6. Find the Website Flags
The next task was to locate flags hidden throughout the website.
The main lesson is that a flag does not always appear as visible text. It may be embedded in HTML metadata, a text field’s placeholder, or an author page.
I checked the following locations.
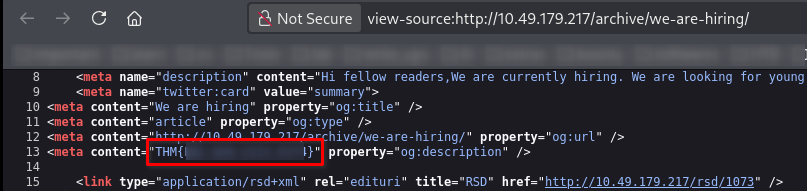
Flag 1: The “We are hiring” article
Open the blog post and inspect its HTML source.
Look for metadata and unusual strings in the <meta> elements.
The relevant flag is hidden in the metadata of this article.
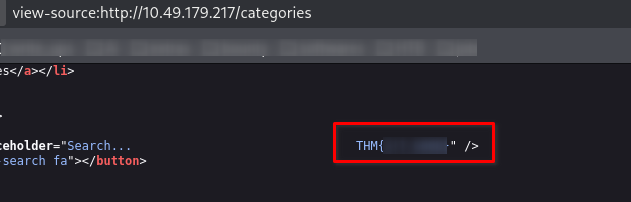
Flag 2: The search field
Inspect the search field’s HTML on the website.
Look for a placeholder attribute:
A long placeholder may extend beyond the visible search box, so inspecting the page source is more reliable than looking at the rendered page.
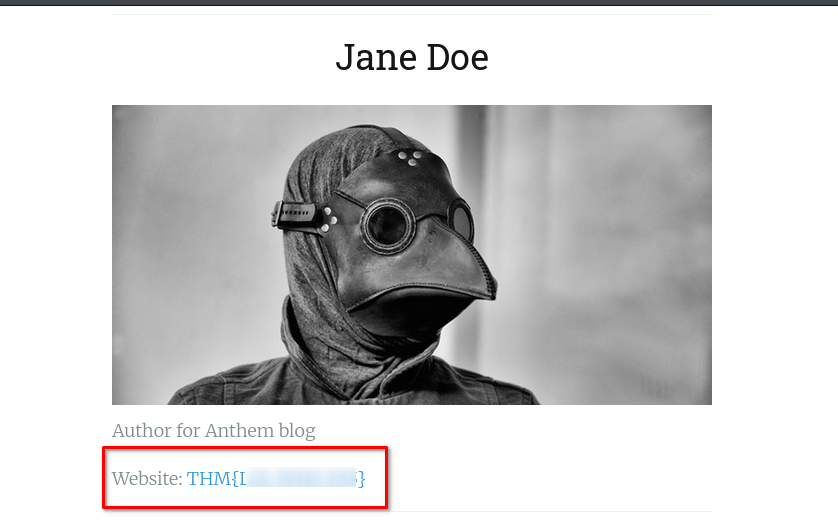
Flag 3: The author profile
Follow the author link associated with the blog.
Inspect the author’s profile page and look for the flag displayed there.
Flag 4: The IT department article
Open the article titled: A cheers to our IT department
Inspect its page source and metadata for the remaining flag.
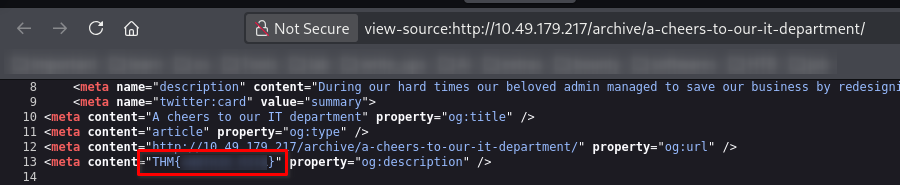
7. Connect to the Windows Machine Using RDP
After collecting the website clues, I moved to the final stage of the room.
Nmap had identified RDP on port 3389.
RDP allows a user to interact with a Windows machine through a graphical desktop. Unlike SSH, it provides a full remote desktop session.
On Kali Linux, I could use FreeRDP:
xfreerdp /v:<TARGET-IP> /u:<USERNAME>
Alternatively
rdesktop <TARGET-IP>
The tool prompts for the password, depending on the version and configuration.
Use the username format specified by the room. Because this machine is not joined to a domain, do not automatically prefix the username with ANTHEM\ or another domain name.
Once authenticated, the Windows desktop becomes available.
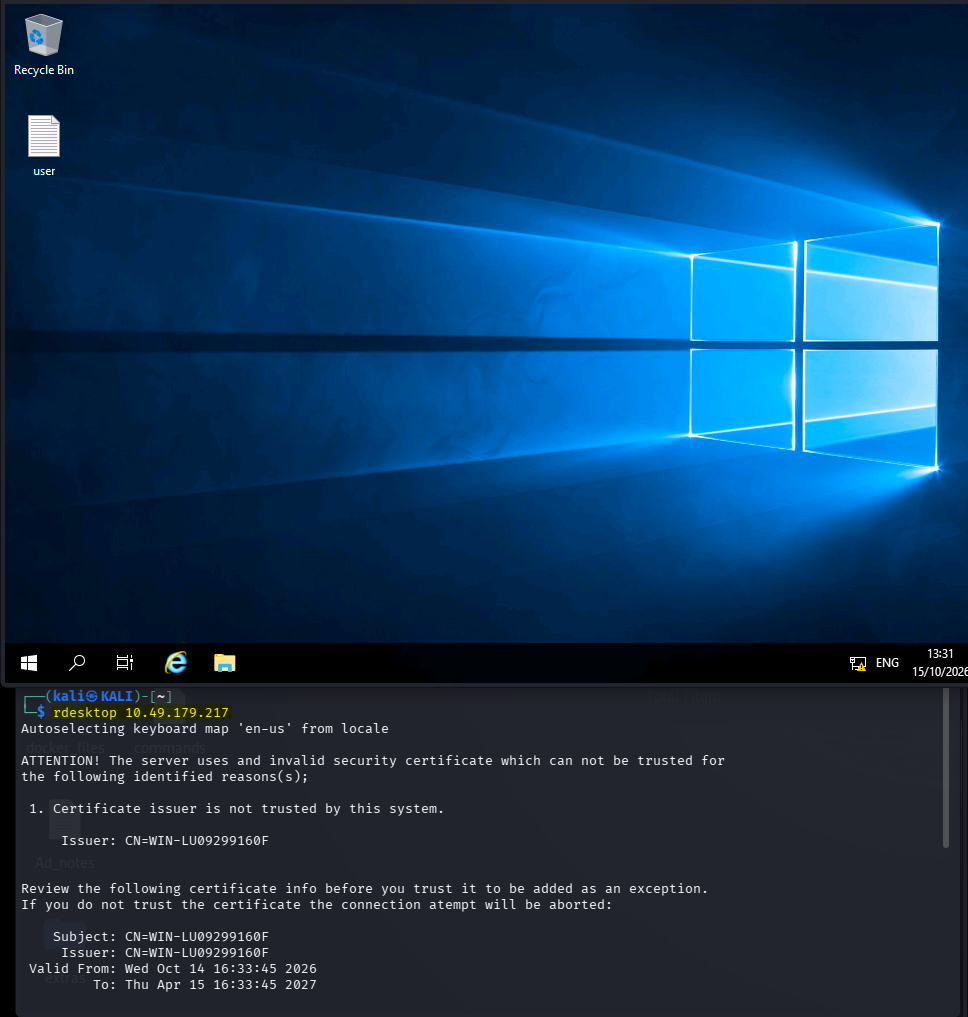
8. Retrieve user.txt
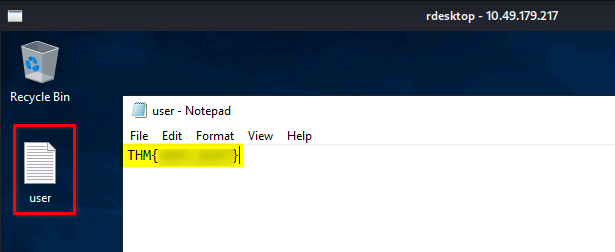
After logging in, I inspected the user’s desktop.
The user flag was stored in: C:\Users\<USERNAME>\Desktop\user.txt
Open the file and submit its contents to TryHackMe.
This stage confirms that the recovered information was sufficient to gain an initial Windows login.
9. Search for the Administrator’s Password
The next question hints that the administrator’s password is hidden somewhere on the machine.
Rather than trying to exploit Windows immediately, I followed the clue and inspected the filesystem.
Open File Explorer and enable hidden items:
- Open File Explorer.
- Select View.
- Enable Hidden items.
Then inspect the root of the C: drive: C:\
A hidden backup directory was present: C:\backup\
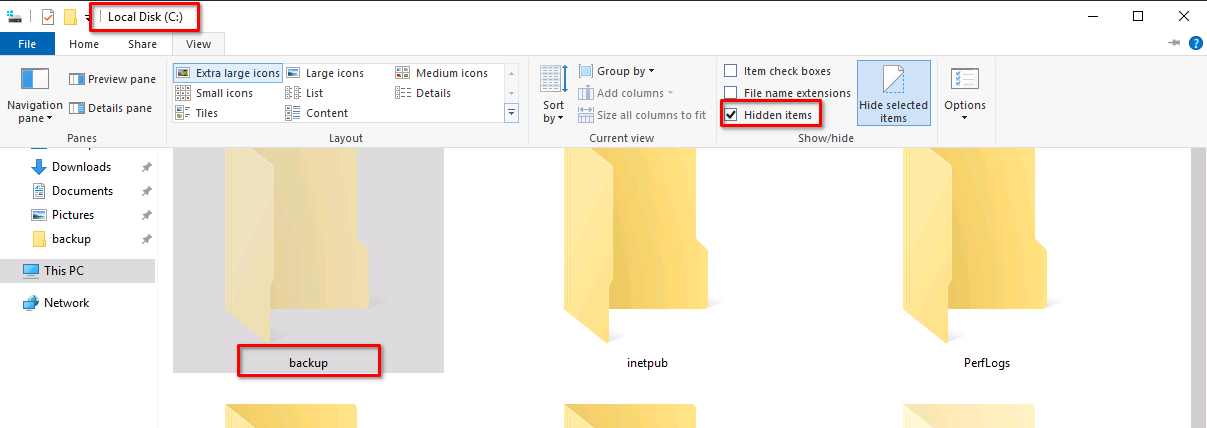
Inside it, I found a file named: restore.txt
However, opening the file resulted in an access-denied message.
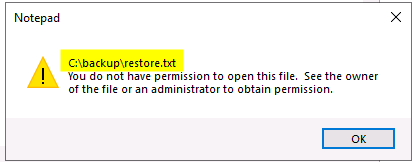
This is an important distinction: being able to see a file does not mean that your current account has permission to read it.
Windows uses NTFS access-control lists (ACLs) to determine which users and groups can access files and what operations they can perform.
10. Understand the NTFS Permission Weakness
I inspected the file’s security settings.
- Right-click
restore.txt. - Select Properties.
- Open the Security tab.
- Review the listed users, groups, and permissions.
The file’s permissions were misconfigured in a way that allowed the current user to modify the access rules.
This was the key to the next stage.
A normal user should not be able to grant themselves access to a protected administrator credential file unless the permissions or ownership allow it.
Adjust the permissions in the lab
Using the permissions interface, add the current logged-in user if permitted:
- Select Edit.
- Select Add.
- Enter the current username.
- Use Check Names to resolve it.
- Apply the required read permission if the ACL allows the change.
Then reopen restore.txt.
The file contained the administrator’s password: C<REDACTED>e
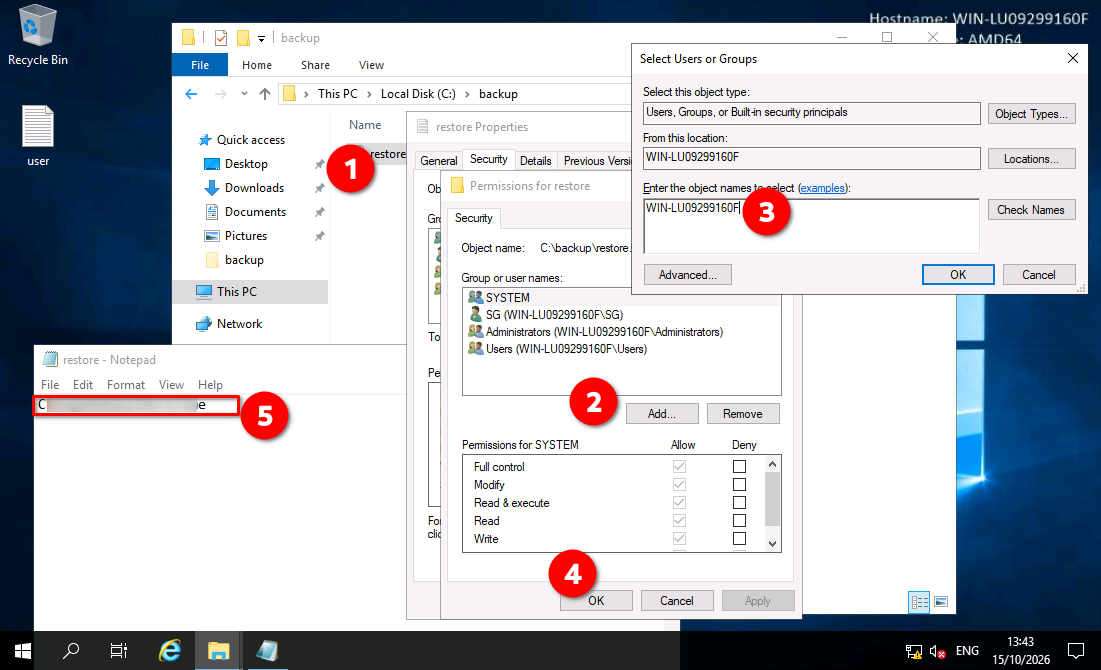
This is the central privilege-escalation lesson of Anthem: a sensitive credential was stored in a backup file whose permissions did not adequately protect it.
11. Log in as Administrator
With the administrator’s password recovered, I could access the administrator account through RDP.
Use the target’s IP address and the Windows administrator username:
xfreerdp /v:<TARGET-IP> /u:Administrator
Enter the recovered password when prompted.
Once the session opens navigate to: C:\Users\Administrator\Desktop\
Alternatively,
After modifying permission we can view the flag right there.
So navigate to: C:\Users\Administrator\Desktop\
The final flag is stored in: root.txt
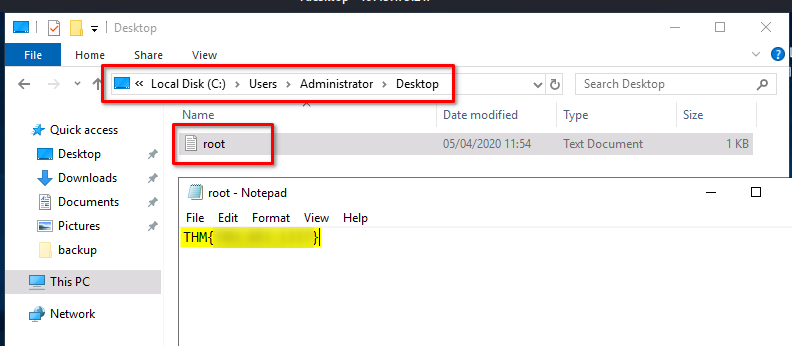
Read the file and submit its contents to TryHackMe.
The room is complete once both user-level and administrator-level objectives have been achieved.
12. Complete Attack-Path Summary
Anthem Target
     |
     v
Nmap Full TCP Scan
     |
     +---- Port 80: HTTP
     |
     +---- Port 3389: RDP
                  |
                  v
          Website Enumeration
                  |
       +----------+-----------+
       |          |           |
       v          v           v
   robots.txt   Blog posts   HTML source
       |          |           |
       v          v           v
  Password hint  Solomon     Hidden flags
                 Grundy
                   |
                   v
              SG@anthem.com
                   |
                   v
           Umbraco Login
                   |
                   v
           Discover Website Flags
                   |
                   v
              RDP Access
                   |
                   v
                user.txt
                   |
                   v
          Enable Hidden Items
                   |
                   v
             C:\backup\
                   |
                   v
              restore.txt
                   |
                   v
          NTFS Permission Weakness
                   |
                   v
        Administrator's Password
                   |
                   v
        RDP as Administrator
                   |
                   v
                root.txt
Thanks for reading!